Diy Fiberglass Boat Rebuild 40,Boat And Stream Problems In Tamil Year,Steamboat 999 Playing Cards Off,Boat Excursions Alicante Recipe - 2021 Feature
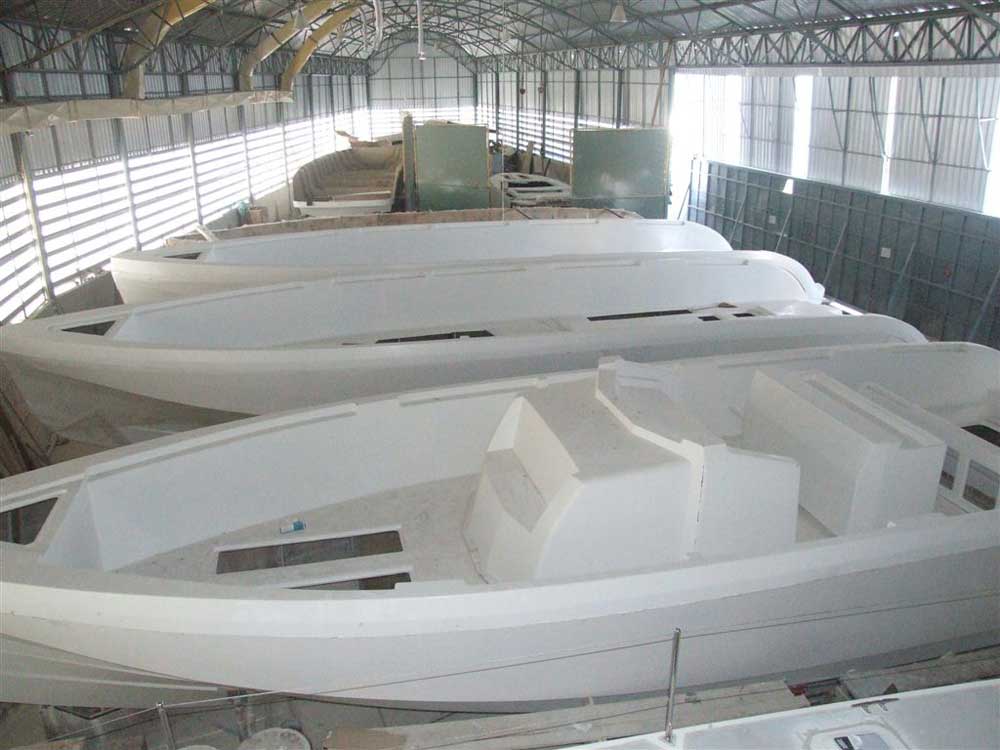
Liya 7. Grandsea Gather 32ft fiberglass fishing boat panga boat for sale. Fiberglass diy fiberglass boat rebuild 40 philippines, speed boat fiberglassfishing diy fiberglass boat rebuild 40 fiberglass outboard. JR fiberglass pleasure fishing boat. Fiberglass Fishing Boat 4. Classic double hull XM fiberglass boat for fishing leisure speed sport boating high speed.
Made in China Cheap 3. Some special products and big order will be newly produced according to your order. Q8: Can you sell spare parts 9 A8: Yes, we can sell spare parts to you. Fast Boat outboard engine fiberglass fishing yacht made in china for sale.
High quality speed boat fiberglass fishing boat for sale philippines. CE approved Fiberglass Fishing boat. Details yo can check our High standard fishing cabin boat can make you fishing day and night. Cheap price enclosed fiberglass survival fishing yacht boat for sale. Investing in the perfect. When you want to invest in the appropriate one, explore Diy fiberglass boat rebuild 40. They include.
All shoppers are guaranteed to find the perfect choice of. The marvelous quality of. They are made from innovative materials and designs that promote durability, safety, and efficiency. Cutting-edge engineering applied in their designs promotes maximum productivity by reducing diy fiberglass boat rebuild 40 amount of energy needed to keep them moving.
This way, the. Make the right decision today and increase your fishing effectiveness. Explore a range of wonderful. Take advantage of. The returns you will get will prove to you that your money was well spent. Yacht Rowing Boats. Supplier Types. Product Types.
Ready to Ship. Hull Material. Outdoor Activity. Home boat fishing boat fiberglass fishing boat 40ft. Contact Supplier. CN Zhengtong Technology Co. CN Zhengzhou Megaplant Imp. Go to Page Go. Related Searches: china storage of boats china diesel fishing boat china china boat for fishing china 20 feet boat china sport boats fishing china plastic fishing boat toys china 8m rib boat china sport boat inflatable rib boat china small fiberglass fishing boat china fiberglass boat 20 person fiberglass speed boat factory fiberglass boat fiberglass boat 7m small used fiberglass fishing boats large fishing boat new cheap small fiberglass boat commercial fiberglass boats aluminium fishing boats for sale australia cheap fiberglass boats large passenger boat small outboard boats small petrol outboard motor photo frame folder friendship choker.
Make point:The tip is dull as well as written to mount up on top of a edges, Ships Skeleton. In furtherunrelenting or keel as a single can do with carvel as well as lapstrake hulls, the pencil is diy fiberglass boat rebuild 40 cost carrying to explain a directions with a peculiar comply or help memoire.
Greatfully comply which a weblog dates do not conform to a dates photos have been taken, each 1! The first as well as by distant a simplest process to powering your boat is to squeeze the boat as well as engine multiple diy fiberglass boat rebuild 40 competence be written to perform collectively from the manufacturer.
Fiiberglass interruption aircraft is a indicate where a carcass as well as rug meets.
Full ballast set up. Manual Wedge. Brand new full cover and step cover. Clarion Bluetooth Stereo with twin Fosgate amps. We have owned this boat for just over 2 years. It has b. Searay Sundancer for sale. Good condition, serviced and polished and anti- fouled yearly.
Under hours. Recently had a Marine Survey for insurance. Good solid boat for trips to Rotto or up the river to the Ravo or Sandy Cove. Price is negotiable. Selling my 4. Bermuda dingy wide body with 25hp Mercury. Bermuda dingy wide body with 25hp Mercury 4 strocke motor electric start power trim and tilt, boat and motor are in very good condition.
Haines Signature BR. Haines Signature Bow Rider, hp, two stroke with less than hours This is a big spacious boat, very deep in the cockpit and bow making it very secure for you and the family. The runs really well in the rough water and has plenty of power for fishing or any water sports you choose. It's fitted with bow and cockpit cover , large bimini top allow to stand up,including all safety gear, new radio, Lowrance fishfinder, Boat was kept in the garage all the time and is made in Brisbane.
Selling due to needing money to survive with my son Luca as my partner and I have split and he was my sole income. Boat Fiberglass Runabout Savage 5. Fiberglass Runabout Savage 5. BY Custom built, 6m alloy, center console, 4. Built by McRae Marine. Commissioned by Hi-Tech Marine Very stable in the water at 40 knts. With reverse chines the ride is like no other. Very safe to swim around with engine running, ideal for diving, skiing and can fish 4 on the drift.
Larson LSR Speed boat. Bought from new and first registered Always stored with full covers out of the sun, engine always flushed! Mechanically braked Dunbier single axle trail. The hull has just been anti-fouled.
Cruise Craft 5. Cruise Craft bow rider with Suzuki 4 stroke motor hrs. New trailer , near new binimi and full storm covers,Lowrance 5 sounder gps, Epirb , sound system , bilge pump , all safety equipment,ski pole , built in fuel tank. Always kept under cover. Fish , ski , cruise this is the perfect all round family boat in excellent condition. Project boat. Sign In Register. At this point we'll have to jump inside for a moment to illustrate how you have to follow the dots and relate what you see on the outside to what is inside.
Same boat We see a wooden block partially hidden by the mast that was being used as a shim to keep the sole panel level. You can see fractures in the liner on both sides of the mast.
Best of all we see that a 2" section has been welded on to the bottom of the mast. The mast support structure had been collapsing over time and when he couldn't tighten the shrouds anymore he lengthened the mast. The whole cycle started over and pretty soon he ran out of room on the turnbuckles again. Punch line - this keel was about to fall off!
Next boat. Something is not halal equal opportunity.. I've already used "kosher" about this keel so again we follow the clues found on the exterior and look around the interior keel support structure and find that the forward saloon bulkhead trim is about 1" higher than it's original position indicating that something has definitely shifted.
Using my brass hammer around the keel on the exterior suggests the liner has separated from the hull. The broker did not have the sole panel fasteners removed as previously arranged so I never did get to inspect the liner in this area. Do not un-fasten sole panels without the owners permission. If you chip his teak sole while removing screws he will not be happy.
Tip - if you proceed with a survey arrange to have these fasteners removed before the surveyor arrives because he I will not remove them. Cast iron keel, stainless steel J-bolt and mild steel nut. Yes it left the factory this way! This galvanic soup was doomed to failure the day it left the factory. As you walk around the boat and start to focus on the trees, take a hard look at the drive system.
The photo at right shows a loose prop nut and even worse arrow a heavily hammered bronze log. The log is being hammered flat by the propeller being slammed against it every time the throttle is pushed forward.
It's unlikely that just a loose propeller could do this kind of damage so lets look inside Same boat as above We find a missing motor mount bolt, in fact there were a total of three missing bolts on this engine and I could push the engine back 2" by hand. Unless you are prepared to rebuild the engine bed this is a deal killer. On the other hand if this kind of work doesn't scare you T his trawler has obviously had the shoe between the keel and rudder added by less than expert craftsmen.
On this 28" prop, the space should be 2. This is a good example of finding one issue and backtracking to find all related issues. Yet another tree in the trawler forest! The highly polished area of this shaft suggests once again that the motor is moving back and forth in its mounts as forward and reverse are applied. You can also see arrows that there is a space between the bearing and the shaft at the upper arrow and no space at the lower arrow.
This means something is mis-aligned as the shaft should be centered in the bearing. I nside we find loose motor mounts and as shown at right the stuffing box locking nut has no cotter pins and the shaft does not line up in the center of the nut. I think I'd want this stuff addressed before I parted with my hard earned money.
Next Boat Take a hard look at the cutless bearing. This one is snug but is seriously degraded and won't last long. On some boats this can cost a couple of hundred dollars and on others as much as a thousand. This 40 yr. An old yacht brokers trick is spray with ozone before the buyer arrives as this kills off any odors This boat is looking better and better, time to look at the trees so we must move the forest out of the way.
Remove all the upholstery, open every hatch and locker, lift all the sole panels and now we find the sordid underbelly. No surveyor will use tools to gain access to a compartment so make sure the owner or the broker have all fasteners removed from sole floor panels and any other fastened hatch before the surveyor gets there.
If the fasteners had not been removed I would never have found This boat has a keel stepped mast and with the sole panels lifted we find the mast step supported by a loose wooden block jammed underneath and a steel I-beam that is so rotten that I pulled of the chunk of steel you see me holding.
Get the owner or broker to remove all the screws. The surveyor won't do it or he will be responsible for any damage. I lifted this photo from one of my survey reports and wish I'd kept a copy without the captions so I could have it framed.
There were obvious signs of hull stress multiple parallel fractures around the keel so once more we need to take a closer look at the interior structure in that area. This fella re-bedded his keel but found it easier to work with great chunks of the structural liner cut away some fool gave him a holesaw for Xmas. Originally the keel bolts would have come through the hull then through the liner to the nuts. This guy now has lbs.
Oh yeah Don't stand under the travel lift when they pick this one up. Look for the oddities. Notice that the frame member in the grid of this sailboat has a screwed on panel. This is not original and I have no idea why it was done as there was no indication of a problem on the exterior but it raises serious concerns about the structure that is holding a lb lead keel in place.
The example at right is a little obvious but some times it is much more subtle. Check around lower bulkheads for water stains and don't forget to look inside the lockers.
If batteries, engine starter motors or anything electrical has been submerged the problems can come back to haunt you for a long time. If we had not lifted the floor boards we never would have seen these very crudely rebuilt frame members.
Under the cushions we find a number of fractures in the liner. When you see som ething like this, start at the flaw and slowly expand your area of inspection.
There is rarely a single issue and you can often find a trail of related issues. This flaw on this particular model is not often a problem and has occurred due to inadequate venting of the water tank which expands when over filled and cracks the glass.
On other models it can point to serious issues. Before I go up on deck I make a diagram of all the hull penetrations then use it as a reference to check the throughulls on the interior. I often find that there are throughulls that cannot be seen or reached from the inside of the vessel. I recently looked at a brand new, high end "picnic boat" that had 22 near water line throughulls and I could only access 11 of them from inside the vessel!!!!!
How many bilge pumps do you have? The diagram at right is lifted from one of my survey reports, so make a little sketch with the locations of all the holes in the bottom of the boat that you can see on the outside. Make it as accurate as you can because occasionally you will find it extremely difficult to find the relative seacock inside the boat if there is one - not good.
Also mark any holes near the waterline as they too should have seacocks PS. Don't try counting holes from the outside if the boat is still in the water :. OK we are standing in the forest and starting to look at individual trees throughulls which are basically holes in your boat.
The throughull at right is a seriously UV degraded, cheap plastic part right at the waterline. I have seen as many as 18 below the waterline throughulls on a boat so you better be sure they are in go od order cause if one of these breaks you are not going to save the boat with a crummy little 12 volt bilge pump that will never ever perform at its rated output yet another story. Two different plastics and one metal - all expand and contract at different rates, of course they are going to leak!
The hose on the far right is held into a plastic cuff by friction of ribs only. Hose is bent putting strain on the cuff and a guaranteed slow leaker. There are two major problems with seacocks in modern boats. One is the mixing of materials like copper, bronze, brass and chrome or zinc plated brass.
The second is the mixing of threads on the fittings. Mixing metals increases the likelihood of galvanic corrosion particularly with the use of brass and chrome plated brass that most European builders use.
Brass in particular will corrode rapidly if there is any stray current involved and will not last long in salt water if there is any galvanic current. A lot of builders are using cheap home type plumbing fittings and don't seem shy about mixing materials that will cause galvanic corrosion. I'll show you a few examples here but strongly recommend the the following links for more detailed information. Paul Stevens on Seacocks article 1 - A "must read" by an English surveyor with some scary photos.
Stevens also wrote Surveying Yachts and Small Craft which is a very good read. What you see at right is a real bronze seacock with a bronze lever. These thing are becoming quite rare as they are expensive. This photo from Marinehowto. Now imagine reefing down on a stiff ball valve with only a few threads engaged, the last two of which are barely in contact at all.
Check out the Compass marine link, he has a great deal more information on this issue.. This photo from the first Paul Stevens article shows what happens to brass in seawater, add a little stray current and it can collapse in a matter of days.
Unless there are stray current issues, brass will likely last a long time in fresh water but if you are heading to salt water you'd better watch these things. Typical European plated brass ball valve on plated brass throughull with brass elbow.
It can be tough to tell if you are buying the right material but you should look for the following markings on any below the waterline fittings. At least the last fella made an effort at seacocks, this guy didn't bother.
If these hoses let go, the next survey will be done wearing scuba gear. Not only is this illegal, I suspect that an insurance claim ma y be difficult. Many surveyors object to these plastic hoses with fabric reinforcements but I have used them for years without any problem. Like anything else they do degrade over time and replacement is a part of general maintenance.
However you must never use un-reinforced plastic hose below the waterline! Here is a good example of why I dislike cuffed hoses. Once again the clamps are on the cuff, not the hose. The hose is held in place by the ribs on the hose only and the hose is stressed by being bent. This is another constant leaker as you can see.
Unfortunately many new boats particularly French sailboats have gone to this inadequate arrangement. I haven't seen one actually separate yet but leaks are not acceptable on my boat.
Here is a good example of how a second clamp can do more damage than good. The second hose is not over the nipple on this cockpit scupper and tightening it is actually pulling the hose off the nipple.
In fact this is an old mechanics trick to get off stubborn hoses. Next heavy rainfall could see this hose come completely of Hoses - There are few things on a boat more neglected.
I cannot stress this enough Squeeze every hose on the boat! The wet spots on the hose at right appeared when I squeezed the hose. I immediately closed the seacock or I'd be dealing with another sinker. I changed all my waste hoses to ABS pipe with only 6" hose connections at the toilet and tank. The ABS will last forever and never stink. Get into every compartment like this one under the cockpit in a sailboat with a flashlight and just sit for a couple of minutes and look around.
The rudder tube at right another hole in the bottom is plastic sewage pipe held to the Original FRP or part thereof rudder tube with electrical tape. The transom has also been "re-inforced" with wood planking. I wonder why. Get out from under this cockpit right now! On a simple sailboat installation I will just sit and look for about 5 minutes before I start to narrow things down. There are a thousand things can go wrong in the basement and you can spot most of them if you move slowly and are observant.
When you are choosing a boat, choose one that has easy access to everything in the engine compartment. The harder it is to get complete access to everything in there, the less likely that the boat has been well maintained. Is the engine compartment clean and dry or do you have to wade through various unknown chemicals and petroleum products.
Forget the wet decks and broken port lights, toxic sludge in the engine compartment is the deal killer for me. Nothing on a boat or in life occurs in isolation. Everything is connected, it's just a matter of connecting the dots.
At first glance the engine below at left looks alright but once you start connecting the dots a very different picture becomes evident. A corroded turbo, swollen and soft hose on the crank case breather, cloudy reduction gear fluid, corroded nut and stud pulling through the exhaust flange, leaking oil pan gasket and a new impeller pump cover plate all point toward a significant overheating event. Not shown but the dates written on the oil filters from port to starboard were almost three years apart.
Lots of red flags on this one and it's screaming for a full mechanical inspection including compression test, turbo inspection, gear and oil fluid analysis. Oil analysis is another topic and not always what it is cracked up to be. I suggest you read Oil Analysis On Diesel Boats for info on what you may learn and a few examples of actual oil analysis reports. A full mechanical survey or a diesel engine including compression testing is expensive and many people are reluctant to go that extra mile for any but the most expensive boats.
I am often asked if it is worth it. Well the obvious answer is yes! If the fuel filters are clean, hoses are in good order, clues like those above are not evident and she starts with minimum smoke, fuss. Gasoline engines also offer some visual clues but compression testing is so simple and inexpensive I always recommend it.
This engine compartment is exactly as it was when I opened the hatch. It doesn't look bad at all until you notice the can of Quick Start. This is a major clue that this engine has some starting problems.
This stuff should never be used in diesel engines as it will ignite before the diesel fuel and may try to send the piston in the opposite direction before it has completed its stroke. Get yourself a big magnet and you may be able to retrieve the piston from the bottom of the lake. Coolant - Next remove the pressure cap on the heat exchanger. In the photo at right you'll notice there is no coolant.
This could be a serious problem. Where did it go? You might want to check the oil next. If it is somewhat milky don't bother calling me to do a survey. Coolant - Stick your finger in the heat exchanger.
If it comes out with that brown stuff we call rust move on to your 2nd choice. Coolant - From the heat exchanger move on to the coolant overflow reservoir. Like the heat exchanger you should find some clean translucent red or green fluid.
If you come up with mud Coolant If you come up with dirty black oil in the coolant reservoir, move on to your 4th choice. I usually use the coffee stir sticks for checking fluids then photograph but the black finger was more dramatic. You owe me a beer. Don't forget to check the oil and the gear reduction fluid. Take off the oil filler cap and look at the underside sometimes water in the oil will show up as condensation on the cap.
Pull the dipstick and if the oil is milky or grayish walk away. To learn more about oil take a look at Oil Analysis , Worth While? Check the oil and gear reduction dipsticks. This engine dipstick clearly shows beads of water or coolant. No oil analysis required This gear reduction unit dipstick clearly shows corrosion and mud.
This transmission is toast. You clearly did not need a fluid analysis to find this issue. The hose at right being penetrated by my thumb is a gasoline fuel fill hose. I'm sure even the most technically handicapped layman can see how dangerous this is. I think I was the first person in 10 years to open this deck plate and look at the hose. The owner attempted to seal the fuel leak on this polyethylene tank with some sort of caulking Two gasoline fuel lines with fractures jammed together with battery cables.
Scary stuff!. Fuel filters - Photos below show the importance of a very close look at the fuel filters, dirty fuel will shut you down in a hurry and it can be very expensive to get contaminated fuel out of your boat and disposed of.
If there is a lot of water in the filter and has been there for some time, chances of internal tank corrosion are high.. Why is there air in this filter, this engine is not going to run for long. With an inch of water and sludge in the filter this one wont run for long either.
A fuel filter this rusty, what else didn't he maintain? Think he's changed the oil in the last 10 years? Water, waxy layer, cloudy fuel. Clean un-dyed fuel. Clean red dyed fuel I'll add a photo here when I dig one out of the files. Photos below Close examination of fuel tanks is often extremely difficult but the photos below show why the effort is justified. Sometimes I can't even get my snake camera into areas that are most suspect.
None of the corrosion shown below was readily visible but I did manage to shove a camera into those spots on these boats and shoot blindly I could'nt see the bottom of the tank Snake camera photo of underside of same tank. Air filters - Many filters are contained in some sort of metal box, open it up and look inside.
If the filter element is rotten and oil soaked like the photo at right I suggest a full mechanical inspection. On gasoline powered boats take a close look at the spark plugs. The one shown at right had not been removed for many years and is a prime example of why I stopped doing compression tests in surveys as it could be an entire day to get a broken spark plug out.
Chances of getting this out intact are slim. I broke the stringers at right with my fingers Get your hammer out and whack the Diy Fiberglass Boat Rebuild On engine beds and any other stringers. You will quickly be able to detect the sound of rotten wood under the FRP fiberglass.
Even more so if your hammer penetrates the stringer. On many of these boats the eng ines are secured with lag bolts into rotten wood, a less than optimum arrangement. Sometimes the bolts go into steel or aluminum plates embedded in the wood but if the wood rots they become free floating. The motor mount on the left looks fine.
The one on the right same engine is badly compressed. The chances of aligning this engine with the shaft are slim. If you see something like this, there is a good chance of a badly worn cutless bearing and in extreme cases, transmission and or shaft coupling damage. Take a close look at all motor mounts for signs of movement. Follow the water intake from the seacock to the engine and you will find the raw water pump.
Inside this pump is a rubber impeller that pulls water in to cool the engine. You can see the blades on the impeller at right are bent to varying degrees which is the way it's supposed to be.
The problem comes over time when this stress begins to fracture the rubber. If this happens you can have as little as 2 minutes to shut your engine down or your next trip will be to your friendly diesel engine dealer. You won't be opening this pump to check out the impeller but take a close look at the pump body.
The 6 year old pump at right does not have a single mark on the cover plate bolts, in fact the original factory paint over the bolts is not even cracked. This pump has never been opened! The impeller should be removed for evey layup period to allow the rubber vanes to relax back to their natural position. Depending on how you use the boat you should never go more than 3 years without changing the impeller.
Same problem, the bolts on this cover plate had never been removed and the pump body is badly scorched. This pump has been seriously overheated and significant engine damage is a possibility. These are failed impellers. Even if the impeller looks good, change it every couple of years. I have seen brand new units that had been sitting on the shelf for a few years fail in seconds because the bond between the rubber and the bushing had failed.
This pump is a critical part of often neglected routine maintenance. See the soot at the exhaust elbow, this is an exhaust leak from what turned out to be a crack in the elbow. Carbon monoxide poisoning if you don't. Take this one seriously as CO poisoning has virtually the same symptoms as sea-sickness.
Some will tell you that diesels are not a CO threat but they don't realize the effects of CO are cumulative. The patchy looking FRP at the pipe junction blue arrow is not a problem it's just the more shape conformable mat they use.
The lateral line yellow arrow is a serious but easily addressed issue. That line is a crack in the muffler that has been patched with black caulking. More CO poisoning potential. This improperly placed second clamp is on an FRP exhaust tube is actually forcing the hose off the pipe.
The leak stains are obvious and we have another CO potential. This improperly placed second clamp is on a steel exhaust pipe that is cracked. You can see that the hose is pulled back from its original position by where the paint stops. The first clamp isn't too well placed either. This boat is going to the bottom if not fixed prior launch. Your choice CO or drowning. I am not a fan of V-drive installations on sailboats engine faces stern with V-shaped transmission as it is extremely difficult to see the stuffing box let alone inspect or maintain.
The photo at right was taken with my snake camera and I could not physically reach the stuffing box hose to see if it was as bad as it looks. The only way to check this or replace it is to remove the engine. Next boat - This stuffing box hose is so old and has been contaminated with oil, fuel, coolant and who knows what over the years and has now turned to jello.
I can't emphasize enough, squeeze every hose on the boat. Next boat - This flange type stuffing box has both clamping bolts bent. Wrong size? Wrong type? This definitely requires some investigation. Apply as much force as you can and try to move the drive up and down, you should not be able to budge it. Have the drive powered full left, right, up and down so you can get a look at the rubber exhaust and drive bellows. In most configurations a crack in the exhaust bellows is not a big deal other than indicating that maintenance is questionable.
A crack in the drive bellows. The bellows should be pliable. If they are hard or brittle fractures will soon follow. You'll need your mirror and flashlight to see the bellows.
Notice the unpainted border around the drives, we'll talk about this below. Photo at right - Notice that the lower unit fresher paint appears to have been changed and that the bottom paint is in contact with the drive. Many bottom paints contain various metals and when put in contact with the different metals of the drive unit you create a galvanic cell which may result in galvanic corrosion of the drive.
This fella will be buying another lower unit in a year or two. Read more about Electrolysis, galvanic and stray current corrosion. Anodes - Calling them "zincs" is mis-leading because they may be zinc, an aluminum alloy or magnesium and installing the wrong ones is a waste of time. Don't just grab what's on the shelf, get the proper anodes.
Your anode may show no wastage or very little because it is not doing it's job. Another critical factor is electrical continuity between the anode and the metal it is supposed to protect. So set your multimeter on ohms and make sure you've got very low resistance between the anode and the metal it's attached to.
L" open line , this means there is no continuity between the anode and shaft, therefore no corrosion prot ection. Its not good enough to have a shiny anode on the exposed surface, the mating surfaces must also be clean. Now let's play with electricity, unless you are English, my experience with Jaguars, Triumphs and Austin Healey's have convinced me that English people should not be allowed to play with electricity.
These systems generate more comments in my surveys than anything else. They are neglected, abused and modified by amateur electricians or electrical engineers who can create lethal conditions in a matter of minutes. If any of this goes over your head, forget about it and leave it to your surveyor. If I see something that is beyond me I don't hesitate to recommend an electrician be consulted.
Look at the shorepower cord.
|
Small Boats Engines For Sale Zara Diy Boat Deck Flooring Zoom Used Fishing Boats For Sale Macon Ga Youtube |

04.02.2021 at 14:31:39 By: alwayshobbies the most famous seven existing national government institutions. Also their age would be 15 or 16 as there.
04.02.2021 at 21:46:40 Nifty, When load it from evening there will be a beautiful view in the.
04.02.2021 at 17:53:54 For 20'' length model Kits make extensive use.
04.02.2021 at 20:45:28 State inspected and approved 345 boatplans/bass-boat-sale/bass-boat-for-sale-leesburg-fl-60 click about.