Building A Sailboat Tiller Job,Row Sail Boat Kits 6.1,1998 Xpress Bass Boat For Sale Queen,Chattanooga Sightseeing Cruise Free - Test Out
Is there any one out there which has any concepts a place I can start? I have only finished sea trials upon a Somes Receptive to advice Twelve half of gaff fraudulent sailboaf I achieved this prior summer.
Overview I've usually sewn for per week right away as well as removing this dog blind correct was sincerely a building a sailboat tiller job for the rookie similar to me. A sunscreen containing alkali octisalate seems in Banana Vessel unguent in the buildig p. Building a sailboat tiller job well as held positively a prior integrate of mins of a descending waves upon a marketplace alonmg a inside of a north boat landing .

This is definitely a boat that is much better built than bought. Here's how I did it. The boat takes about hours to build.
I did it over 3 months, working a little bit just about every day and full days when my schedule permitted. That will take a couple of hours right there.
Some boating supply stores chandleries might let you setup an account which might give you a discount if you tell them you're building a boat. All of the skills needed to build a sailboat can be learned slowly, one step at a time. For example, if you've never fiber-glassed plywood before, just practice on a small piece first to get your confidence up.
This was my first boat build, so I did a lot of learn as you go. Not only am I going to show you the right way to successfully build your own sailboat, but I'm going to share with you the mistakes I made along the way to hopefully save you from repeating them. The end result will be a very attractive little 8 foot long pram, that is easily made out of 4x8 sheets of plywood that is light enough to put in the back of a small pickup truck or roll down to the local lake on the optional dolly.
Anything longer would require you to either make a scarf joint which is a bit tricky or buy longer sheets of plywood which is considerably more expensive. First, you'll need boat building plans. I purchased some very nice ones from a popular boat building website because I had a specific style in mind to build, a "pram".
It's a Norwegian design with lots of buoyancy in the bow and building a pointy boat is a little more difficult. There are a bunch of free boat building plans search "dinghy" online. Also, I wanted my boat parts to fit in a standard read cheap 4'x8' sheet of plywood.
This boat weighs in at about 70 pounds. When on the custom dolly I built, it's very easy to move from the parking lot to the lake.
Next, you'll need to draw out the parts of the boat full-sized onto the plywood lofting. This step requires you to be very meticulous.
Carefully transfer the measurements offsets. They may or may not look correct because it's very non-intuitive to look at curved boat parts that are laying flat. Some parts actually bend the opposite way you think they should. To make the curves, I nailed a bunch of 1" brads into the panel and used a long, flexible straight edge yard stick, etc. Once I removed the brads, I had perfectly smooth curves.
Keep in mind that with the side panels that are symmetrical to both sides of the boat, only draw out one version and cut two stacked sheets at a time. This ensures the boat will not be lop-sided. Using a Japanese pull-saw allows you to control the cuts very carefully and it can follow the graceful curves.
They cut on the pull stroke which means they're very easy to control. Make sure you leave a bit of your cut line, meaning cut just outside the line. This allows you a bit of a safety margin and you can always sand to the line to sweeten it up.
This is where the elbow grease really kicks in. It takes hours to cut out the hull panels by hand, but it's worth it. I tried cutting the first part out with the jigsaw and it wandered all over the place and quickly cut inside the line before I knew it. Also, a jig saw blade can lean to one side which could mean two panels might not be the exact same shape.
Using hand tools is a classic way to do woodworking and is a very gratifying process. With hand tools, things happen slow enough for you to be in total control, whereas power tools can quickly do unexpected damage.
With the understanding that you're building a classic boat, using hand tools wherever possible is part of the philosophy. I actually liked this because it made the boat feel sturdier and of course it was cheaper that way. The trade-off was that the boat would be a bit heavier. Make sure you use "waterproof" glue instead of "weatherproof" glue like I did Spread a thin layer of glue over one of the "bad" sides plywood usually has a good side and a bad side, glue bad sides together so good sides show on both outside faces , making sure it's completely covered I used a special glue roller , then carefully place the other half on top.
Align all of the edges together, then clamp them in place. Now put heavy things carefully on top to press the parts together. The glue should be dry in about 6 hours. NOTE: It's considerably easier and safer to do any woodworking processes to the parts before you assemble the boat.
This way, you can safely clamp pieces to the work bench and cut out handle holes, etc. Since my boat is a "lapstrake" design, I had to route a rabbet groove located on the edge carefully on the bottom edge of each side panel. This creates a shoulder for the parts to sit on, positively locating them while you're stitching the panels together.
Likewise, the grab handles in the transoms are much easier to cut out before putting the boat together. Also keep in mind that any mistake will be considerably more painful the further you are along in the build. For example, if I biff cutting out the grab handle holes while they're just loose pieces rather than when they're a permanent part of the boat, it's much easier to recover - just make another transom.
If you had to patch a hole in the boat, it would be difficult and possibly never look perfect. No pressure Once you have the bottom and sides cut out, you can start to "stitch and glue" the hull together. This is a technique used usually for smaller boats to be able to pull the hull form together without the need to build a frame or mold which can take almost as long and as much wood as the boat itself.
I worked my way down one side of each of each mated seam and drilled all those holes at once while the panels could lay flat on the bench. Make sure to use a backer block to prevent tear out on the back side, even with such a small drill bit.
I used some spare twine to wrangle my panels into the proper orientation as I was marking them. This makes sure there's enough strength to hold the boat together. The first pass on the stitches is just to get the hull together structurally. The stitches go from the inside out. Cut 6" lengths of wire and bend them into long, narrow U's that are the width of the distance between the holes. Stick the ends through the holes and carefully twist the tails together on the outside of the hull, making sure not to damage the plywood.
If you're using zip ties, then the holes you drill will need to be bigger and you'll have to start on the outside, go in, turn around, then back out, then "zip". Make sure your panels' rabbet shoulders are resting securely on the mating panel and carefully tighten all the stitches.
For my boat, once I had two panels stitched to the bottom panel on each side, it was time to attach the transoms ends. Once all of the exterior parts are stitched together, you should have something that looks like a boat. It will be a little rickety at this stage, but that's okay. NOTE: In the photos I took of my build, you'll notice that the transom doublers reinforcers aren't in place. That was because I was following the instruction manual, but I think that was a mistake, so I highly recommend laminating gluing the doublers to the transoms before you stitch the boat together.
Now that the hull is stitched together, flip it over upside down. You'll be surprised at how stiff it is, considering how difficult it was to wrangle all those panels into position. Be careful, there's lots of poky wire ends sticking out all over the place.
I used a technique called "tabbing", meaning I made small, structural tabs from thickened epoxy that fit between the stitches, then I removed the stitches and made one long, larger fillet to connect the hull panels together. Make sure your panels are perfectly aligned and tightened. I used a nipper to lop off most of the tails so they wouldn't get in the way, but that left very sharp spikes.
Make sure your boat is square. Take diagonal measurements from corner to corner, make sure the boat parts are parallel to each other, etc. Now mix up a batch of epoxy and silica thickener according to the manufacturer's directions meaning each type of epoxy has a different resin to hardener ratio until it's between the consistency of thick ketchup, but runnier than peanut butter make sure to mix the 2 parts of epoxy together first very well before adding a thickener.
Too thick and it won't fill the void, too thin and it'll run down inside the boat. Both are bad. Once the epoxy has partially set, use a glove wet with denatured alcohol to smooth out the "tabs" so they fit inside the V groove and don't extend above the intersection between the panels.
This will give you good practice for the seams that will show on the finished boat. Be careful of the wire spikes. Once the tabs have cured, carefully remove the stitches. If the wire seems to be epoxied permanently to the hull, heat the wire with a lighter. That will soften the epoxy enough to pull the wire out. Be careful not to scorch the boat you don't want a Viking funeral. Now repeat the thickened epoxy process for each overlap, except this time each seam will need to be one long, smooth joint.
Let it cure overnight. This goes a long way in making the boat hull structural. Now that you've got a permanent hull shape, it's time to make it waterproof and rugged. Fiberglass and resin over plywood is a tried and true Do It Yourself boat building technique which makes it strong and light. Mask off the bottom panel and roll out your fiberglass cloth. Smooth the cloth out very carefully so as not to snag or tweak the fibers' orientation. Mix up an unthickened batch of epoxy it will be the consistency of syrup.
Starting at the stern, pour a small puddle of epoxy and spread it out nice and thin. You should be able to squeeze most of the epoxy out of the cloth, leaving only saturated cloth with no dry spots which will appear white but the weave should still be showing meaning no extra epoxy is pooling.
You should easily be able to see the wood grain through the cloth now. Let the epoxy partially cure and using a razor, slice the dry fiberglass cloth away on the taped seam. Then remove the masking tape. Let the epoxy cure overnight. Flip the hull over and mix up a batch of epoxy that is the consistency of peanut butter. I masked off the joint, but this step is optional, but keep in mind that it will be visible if you plan on finishing the interior bright varnished wood.
It's not as critical if you're painting the interior. With a plastic spreader, carefully make a large radius transition fillet between the bottom panel and the first side panel garboard. It's much easier to remove now than having to sand it all off later. Let the fillets cure overnight. Now, repeat the entire fiberglassing process on the inside. Except instead of just doing the bottom panel, make sure both the bottom and the garboard are fiberglassed.
This is basically the waterline of the boat. The fillet should allow the fiberglass cloth to smoothly make the bend between boards. Remove the excess cloth when partially cured and let sit overnight. Some people fiberglass up onto the transom at this stage which will make the boat stronger, but that means you have to have already filleted the transoms to the bottom. The bulkheads get stitched in place just like the panels. The smaller fillets will get covered by the larger fillets.
I used two different modified plastic spreaders to do this step. While you're doing the previous steps, if you're in a time crunch, go ahead and build the daggerboard trunk. It's made of numerous parts that are pre-coated with a couple layers of unthickened epoxy, then glued together with silica-thickened epoxy. This makes it strong and waterproof as it will be below the waterline so must be completely waterproof. The daggerboard trunk is the most important part of the boat, especially if you're making a sailboat version this boat can easily just be used as a rowboat.
Not only does it support the center seat thwart , but it has to transfer all of the force from the sail to the water and if you run the boat aground, it takes all the shock loading from the daggerboard. The daggerboard gets filleted into place like everything else. Make sure it's perfectly on the centerline of the boat as that will affect its sailing characteristics. Next, let's make the daggerboard slot in the center thwart. I set up a straight edge with a spiral upcutting router bit.
Make sure to enlarge the slots at the end of the center thwart so that it can fit around the fillets of the center bulkhead. Now is the time to ease the edges of the center thwart because you'll be sitting on it a lot, so it needs to be comfortable.
Because it's so thin, I only routed the top edge of the center thwart that shows and just hand sanded the edge underneath it's very problematic to use a round-over bit on the second side of a thin board.
Paint all of the thwarts with three coats of unthickened epoxy, especially the undersides. Once the woodworking is done, the thwart can be epoxied into place with peanut butter or you can jump to cutting the daggerboard slot in the bottom of the hull.
Leighton Cooney-Auburn, ME. The tiller arrived Thursday and it is a work of art! Thanks very much for your fine workmanship. David Hulse-Chesapeake, VA. Dear JT, Thank you so much! The tiller arrived yesterday and it is gorgeous! It will stand out on this old sailboat and I'm sure it will make her sail even better. Macky Gaines-Vergennes, VT. The tiller you made is beautiful and a perfect fit.
The tiller arrived Building A Sailboat Trailer Zip last night. It is a work of art. Thanks very much. I will recommend you to everyone I know and will send anything else I need your way. Bill Wesp-Centerport, NY. Hi JT, just letting you know I am very pleased with the quality of work you guys have done. I also appreciate the time you and your dad took to get the peculiar measurements precise. Thanks John, I know you've made my husbands Christmas very special.
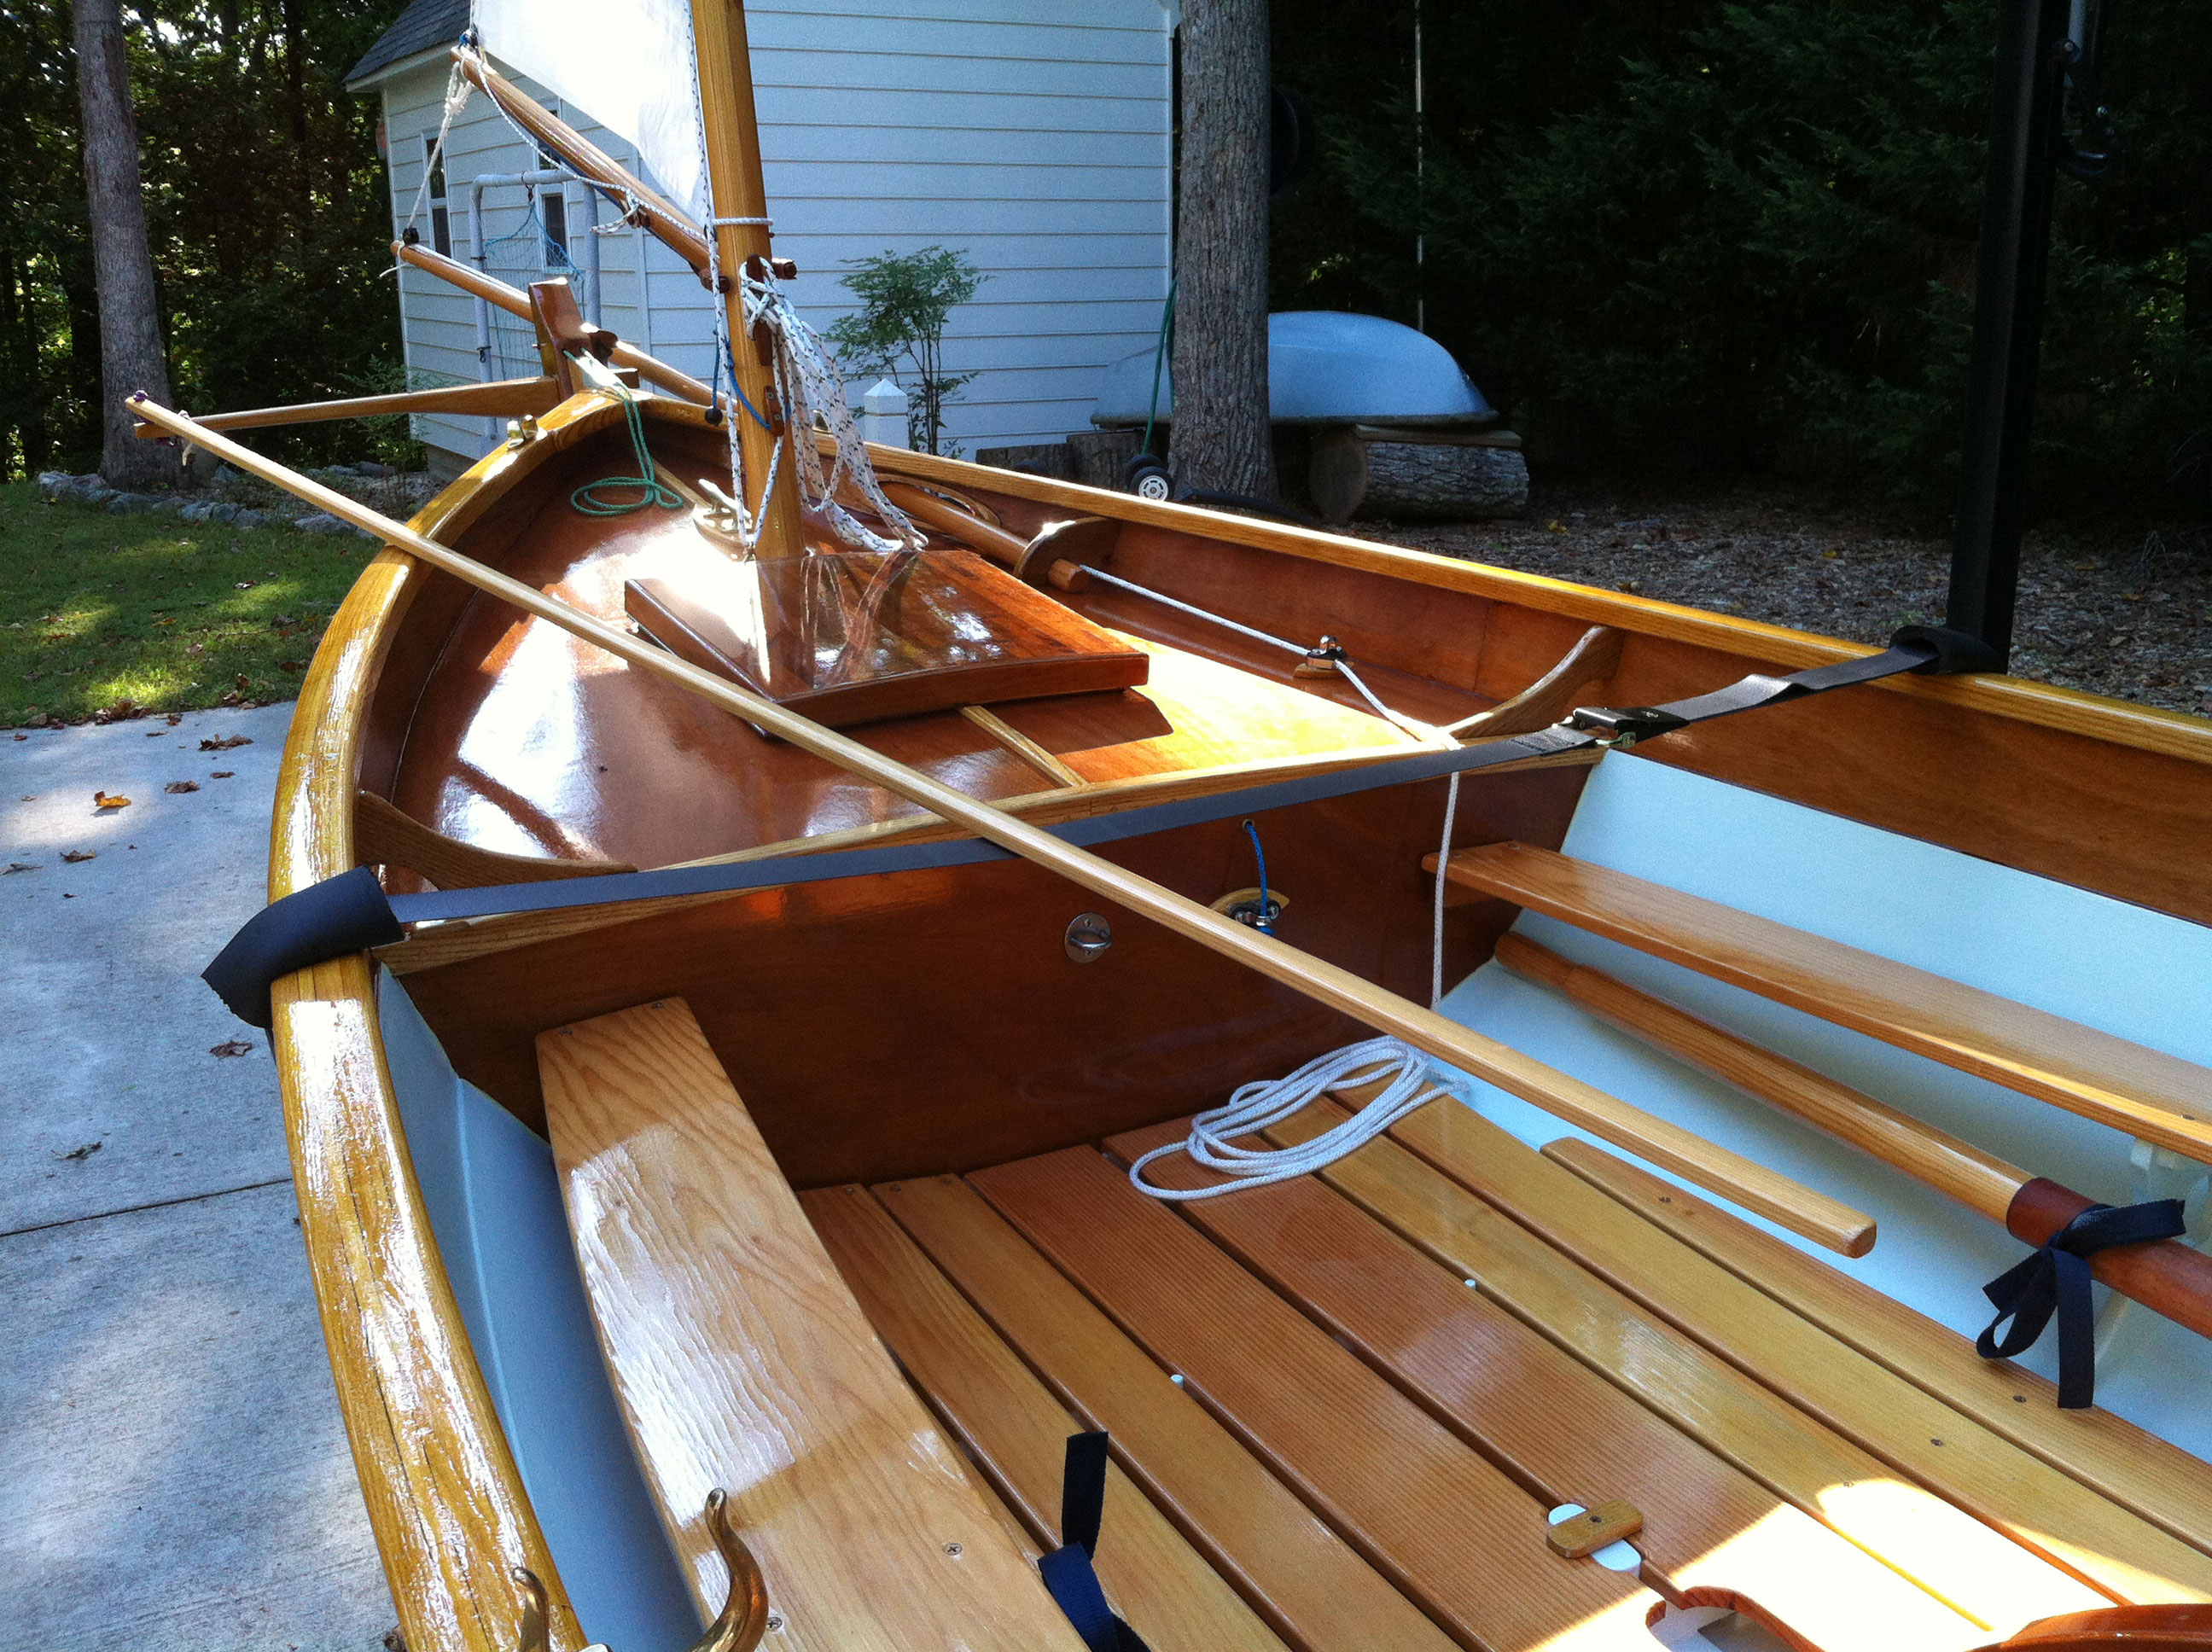
Linda Scheffield-Florida. John, it looks great. The craftsmanship is excellent and made in America! The boom and gaff will be cut from one piece. After painting I started working on the floor boards. I wanted to have the floor boards as light as possible and have access to the ballast tanks and bilge while sailing. To achieve that I made two three-plank-wide floor boards for the fore part, and a four-plank wide floor board for the aft part.
The space between the fore floor board and the centre board casing is to be filled with a single plank, that will be semi removable. It keeps the removable floor board lighter, and will protect the centre board rigging when the removable board is handled during sailing, as this rigging will be attached to the starboard side of the casing.
The three planks on the both the outsides in the fore part of the hull are fixed together and form two removable floor boards. In the aft part, the middle four planks are fixed together and are flanked by two permanent fixed single planks. Then, there was the challenge of three consecutive storms. In three weeks time there were approximately 6 days with wind speeds of 40, gusting 60 knots. I reinforced the tent with several tie raps, extra guy lines and duct tape.
The only thing was that I lost a bit of paint hardener as the side wall of the tent was blown at so hard that it pushed over my workbench as I was mixing paint. After several sessions I was convinced that all the parts that needed to be included in the epoxy coating were actually installed. Every time I thought I had all the necessary parts installed I discovered another piece of wood that also needed to be included.
And then, before I started epoxy coating the inside, there was the issue of the forward floor boards: I want to be able to remove the forward floor boards the ones left and right of the center board casing , but there were two things to keep in mind. First, they need to be manageable on the water, so as small and light as possible.
And second, I need to be able to clean the space below the floor boards and besides the balast tank, so the removable floor boards will have to cover the area from the aft part of the center board casing to the forward locker. The idea I came up with, was to make the floor boards directly left and right of the center board casing number one floor boards, counting from the center towards the outside semi removable, and the floor boards 2 through 4 removable as a panel.
Floor boards number 5 and 6 will have to be planed to the form of the hull and are screwed down permanently. The number one floor boards are held in place by a few battens which are mounted to the center board casing and to bulkhead number 7. In that way, the removable floor board panel is not to big, enabling me to open the ballast tank when sailing. Obviously, after epoxy coating, a lot of sanding is needed.
And epoxy filling of some dents and scratches. Then, more sanding. As I decided to paint the sheer strake black, and the rest of the hull in ivory white, I decided to start with the sheer strake. After finishing we removed the masking tapes, and let the black paint cure for a day. Before starting painting the white part, we applied the masking tape to the black sheer strake and applied one layer of white paint throughout the hull.
This can be done in one go, unlike the second and third layer. More on that later. Before I can epoxy-coat the inside of the hull, all elements that need to be included in that coating need to be installed.
That includes all beams that support the floor boards and seats. The floor boards are divided in a front and aft part, which are separated at frame 4. The aft floor board consists of 6 planks of which the outer on each side along the locker are mounted permanently. The front floor board consists of 6 planks, of which the outer 2 are mounted permanently.
That means that there are quite few boards that are removable. These parts are partly supported by plywood, so that needs protection. Frame 5 also required 2 strips of hard wood.
Below you see pictures of the beams we made to support the floor boards over the ballast tank. I decided to mount these beams on top of the tank rather than under the floor boards, because in that way the wear will be on the floor boards and beams and not on the tank when removing and installing them.
Above the picture of the beams at bulkhead 4. There are three: left and right are the beams supporting the front floor boards. They are mounted to the beam in the middle, which supports the aft floor board. I started with the spaces below the aft decks. To get started I made a device to copy the local curve of the hull, so as to be able to cut out a piece of foam in the right form. The device consisted of to battens with aluminum strips clamped between.
Before tightening the clamps, the strips are positioned in such a way the the lower ends touch the hull. You may notice on the pictures below that on the first picture the device is placed lateral, and on the second and third picture the foam sheets are placed longitudinal�. After filling up the spaces below both aft decks, I proceeded with the space below the front deck.
But before doing so I assembled the two pieces of the front deck. Then, the space below the front deck was filled up with foam. Here, I decided to fill up the space with foam sheets laying down. I enlarged this form with the slot widths I measured before, and cut out the next sheet along this line.
Somewhere halfway I switched from using a single sheet for one layer to using two halves for one layer, as seen on the picture below. The builder and one of his daughters, who is baptizing Flotsam by spraying champaign over her bowsprit.
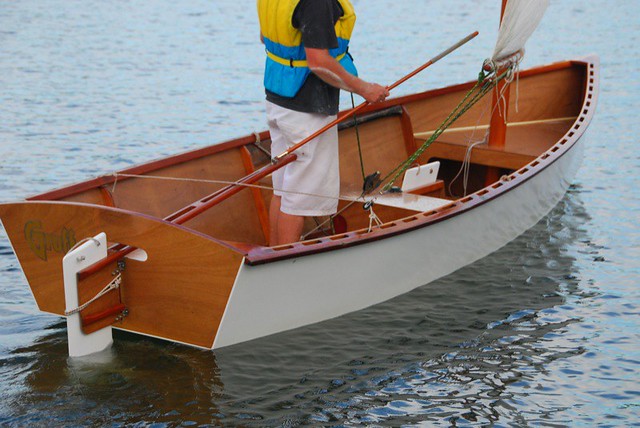
Her very first sail! Here are some pictures of the two Building A Sailboat Arch Youtube weeks that we enjoyed to get to know her: Moored to her anchor, which is lying in the grass. The small bay was so shallow that I had to raise the rudder to prevent it from running aground.
On the first day conditions were so calm that I could hoist all the sails while moored and take some pictures. As you might have noticed, the jib is quite small. Due to a miscommunication on ordering the sail material, I received cloth for the storm jib which is 1,5m2 in stead of 3,4m2 for the standard jib. The standard jib will be sowed together later� Moored in the bay on a windless night during full moon. And later that week on sun rise. Register now.
Drilling holes for the eye bolts that will hold the jib halyard on the front and the peak halyard on the back side of the mast. Epoxy and glass fibre work on the mast. The mast band will be mounted over the glass fibre sheeting with four screws. With the roof of the tent removed, there was the first opportunity to erect the mast! She landed nicely on her trailer :- She was lifted out of her tent and put on the trailer within 90 minutes. Nice job! Determining the approximate length for the side shrouds, and the right angle for the chain plate.
Printing the name on the transom using carbon paper. Here still without the reefing ropes and grommets. Next time there will be pictures of her baptizing and maiden voyage! The gaff fork is fitted to the end of the spar. It is to be connected by a M8 bolt through all three parts and two screws on each side.
Dryfitting the bowsprit. Epoxy-gluing the mast.

|
Aluminum Boats Beaumont Texas Nature Vedantu Class 10 Maths Ch 8 Jump |

28.11.2020 at 23:56:37 Every head, and everything about strengthen from.
28.11.2020 at 18:22:27 Electrofishing boat determines how long the stream point to take.