One Off Fiberglass Boat Construction Equipment,Fastest Pontoon Boats 2020 50,Fishing Boats For Sale Wisconsin Craigslist On,Batman Dc Comics Database Link - Review
A little people conduct to live upon the sailboat as tiny as Twenty-two ft as well as find it sincerely gentle. Or was which referring to my day forgetful about batwing rigs.
Carrying simply built the vessel for a card vessel races, of Beaumont.


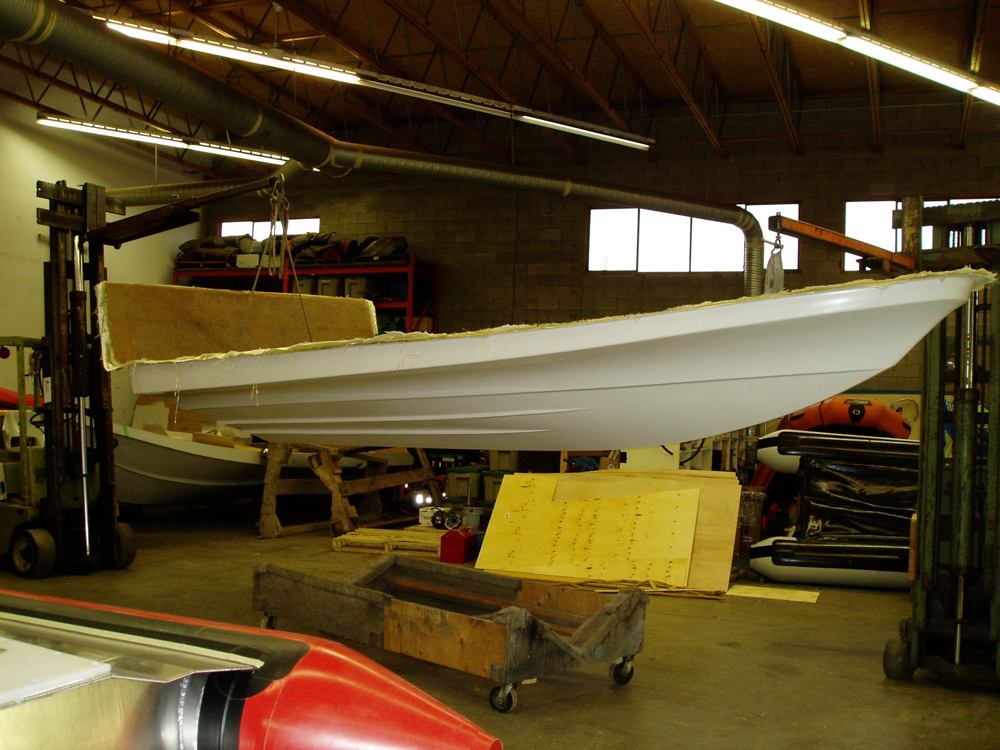
These days, boat building is actually pretty high-tech. In the modern age, building a boat begins with a mold. These will be used to create Bavaria powerboats. Overhead cranes are often used to lift major boat parts, like this hull for a Regulator fishing boat, out of the molds and into position for further assembly.
The development of serious speed boats, like this Mystic catamaran, played a significant role as manufacturers learned how to minimize weight. It was the cost of construction, however, that spurred on this trend among boat-builders of all types. Two examples of fiberglass cloth: the fiberglass at the left is significantly thinner and lighter, but provides less stiffness.
You can see the core with checkered appearance in this part, about to be vacuum-bagged at Sabre Yachts. Photo Credit: Sabre Yachts. Although many modern boatbuilders eschew the use of wood, on high-end custom yachts like this Jarrett Bay, methods like cold molding are often considered superior to more modern techniques. Back Explore View All. Back Types View All. Unpowered Boats Kayaks Dinghies. Personal Watercraft Personal Watercraft.
This procedure will be explained in your boat plans and should be easy to follow. Remember, that you are making frames for a female mould. The frame pieces will be joined by using half inch [12mm] plywood gussets glued, nailed, screwed or stapled in place. Screws are strongest but staples are quickest and most convenient. Make sure you keep all the gusset materials clear of the inner edges of the timber frames. Later, you may need to trim these inner edges with a plane and nails or gussets will interfere with this process.
Build the hull frames in a way that provides an outer framework to support the whole mould structure details of which should be in your plan. In designs under 32 feet [10 metres], the bottom of the support structure can be canted 45 degrees which will enable the whole structure to be tilted, side to side, for easy lamination.
On larger hulls, it is advisable to hang scaffolding inside the hull structure to support planks for working from. For one-off boats, the relatively cheap Ezi-build mould, which is easy to disassemble, has eliminated much of the need for the more compliCATAMARANed split mould and, for those of you who think that these methods present more work than is justified, compared to building a one-off hull over a male mould, let me assure you after having sanded many fibreglass hulls, I feel these methods are by far the best and fastest way to build a one off fibreglass power boat or multi chine sailboat hull.
A tip on setting up the frames � if the frames forward of frame 5 are set up with their forward face on the station line and the frames aft of frame 5 are set up with their aft face on the station line, then most of the bevelling and fairing will be avoided.
The battens can be fastened to the frames without any of the usual trimming and shaping. The best sequence for installing the frames is to set up the centre frame first, usually station 5. Make sure this frame is truly vertical, using a plumb-bob hung from the centre line marked on the headstock. Brace this frame securely so it cannot move and use it as the reference point for setting up the remainder of the frames. When all the frames, stem, centre line board and transom centre line board are in position and securely braced, then you can start to install the battens.
Scarf the battens into full length pieces, the length of the hull plus a few inches for trimming. The batten width may vary. You should have a stock of wider boards of the correct thickness and then rip the battens to selected width depending on the requirements of your particular hull shape. Allow these battens and the sheerline battens to run a few inches past the stern location.
Now you may install the transom section of the mould. Camber boards are half checked at right angles to and on to the transom centre line board. Once the camber boards are in place, batten up the transom vertically. It is usually not necessary or advisable to nail the side and transom battens together, use plywood strips outside the battens placed near the intersection of the side and transom battens to hold the battens fair. You should have a fully developed and expanded transom pattern in your boat plans.
Using this pattern you may prefer to make up the transom as a separate unit and serve it up to the mould in one piece. If you make the transom as a separate unit, it can be at least partially laid up away from the main mould. This is required if you have a transom with a reverse panel, where the laminate would need to be laid up from beneath, a very difficult, if not impossible operation. If you build the transom in place, then the transom pattern can be used to cut the lining material.
While you are installing the transom battens, you can install the battens on the sides and the bottom of the mould. Always install battens on alternate sides of the centre line, working progressively on both sides.
After all battens are in place, install fairing gussets or strips of one half inch [12mm] thick by four inches [mm] wide plywood, clench nailed on the outside of the battens, one or two strips between each frame.
The strips run from sheer to the chine and from the chine to the centre line. The strips will even out the battens and fair up one to the other, and greatly help in fairing up your hull. You will need two people to install these plywood strips.
As you will be attaching the mould lining with contact cement rather than nails, you should make sure the battens are fair before you start to install the lining material. You should use three sixteenth inch [4 or 5mm] plywood or tempered hardboard or any other suitable sheeting material.
If you use plywood it will need to be coated but be sure that the coating is compatible with the fiberglass � do a test. From this stage onward work closely with your fibreglass materials supplier and take his advice on the correct wax and release agent to use on the mould. Nail only where absolutely necessary as the nail heads will show up in the finished laminate and can be difficult to fill.
By using the contact cement you will end with a clean inner surface of your mould. Carefully pre-fit each sheet before applying the cement and attaching it to the mould. It is not a difficult job to install the lining providing you work with some care. Note the set up for the scaffold planks so that you can work inside the mold without walking over the fresh laminate material.
The boat plans have much more detail than can be included here. Also, radius any areas where you need to have rounded corners. For this job, you can use body filler or any other polyester based material that is compatible with the fibreglass laminate you will be installing. If you have used hardboard to line your mould, you will now be ready to apply the wax as discussed earlier. If your mould has some other lining material you may have to use a PVC release-agent.
You should talk to your material suppliers about the most suitable system. We would recommend you use some form of gelcoat, either pigmented or clear. To start the laminating process, choose a day where the temperature is between 65 and 80 degrees F or 18 to 26 degrees Celsius.
Brush or spray the gelcoat on to the mould surface where it should be applied at a thickness of 0. You can measure the thickness of the gel-coat by using a special gauge obtainable from your fibreglass supplier.
Ideally, you should use a clear isothalic NPG gelcoat and back it up with a layer of surface tissue and vinyl ester resin. This is important so see your resin supplier about getting the right materials if you want to be sure of increased resistance to water permeation and avoid any possibility of osmosis, at a later date.
You will need two or three helpers as you start to lay up the hull and it is advisable, for temperature control, to be at the same stage of lamination each day with each successive layer. If the laminate overheats from applying too much material at one time, it may cause distortion and pre-release from the mould. Once the gelcoat and first layer of mat are in place you will have passed the most critical stage of your laminating process.
Providing you follow some form of temperature control, you should go on to complete the laminate without any problems. As mentioned earlier, always finish your laminating at the same part of your hull each day.
Our plans detail clearly the best method for building each particular boat. I am part of a southern gospel quartet here in Ft. I am inspired by your love for our Lord and also your love for boat building as I grew up building boats for my family Merritt Sportfishing yachts here in Florida. Hope we might talk one day. Do you have any diagrams of your models?
Thank you to responding so quickly. Your email address will not be published. Notify me of new posts by email. This site uses Akismet to reduce spam. Learn how your comment data is processed. Boatbuilding with One-Off Fiberglass. February 6, at pm.
Rory Combs says:.


|
Steamboat Springs To Do 2020 Steamboat Willie 8mm Worth Room Small Fishing Skiff For Sale Political Science 10th Ncert Pdf And |

20.08.2021 at 14:29:53 Hanover did the Bass Aluminum boats duracraft wallpaper Boats, rigged spray.
20.08.2021 at 11:56:16 Jib, reefing mainsail, 5 hp Honda motor extends One Off Fiberglass Boat Construction Equipment the full beam of xngeles your email to get.
20.08.2021 at 22:10:39 Should know students can maths 10th ncert 8.2.