Diy Fiberglass Boat Construction Valve,Small Round Wooden Kitchen Table Item,Ice Fishing Tent Costco Online,Byjus Class 7 Maths Chapter 4 Visa - Easy Way
We squeeze your hair the specialized ship pattern program as well as have the operate it for the span hours. A single alternative technique is called stitch-and-glue. Time to get the st.

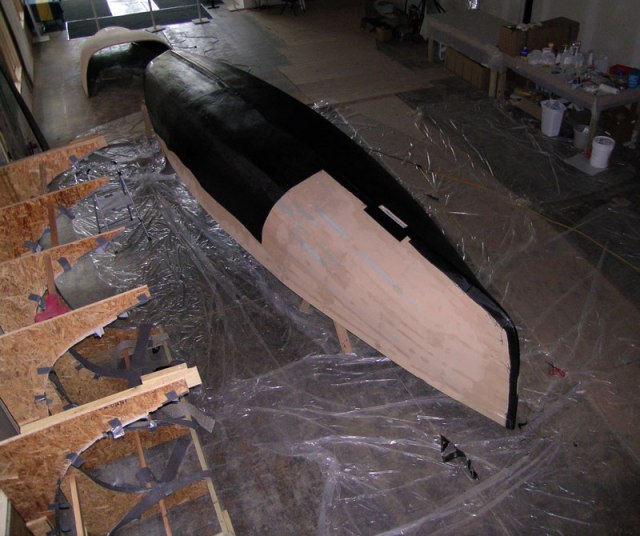
The drawback is the cost of the composite materials from which this type of boat is built, which can be quite high. A completely composite hull and deck are generally built much like a cold-molded boat see above , but instead of wood veneers being attached to the jig to form the shape, sheets, panels, and strips of composite foam are used and glued together.
Once the shaped of the hull has been achieved, multiple layers of fiberglass and epoxy are applied. The hull is then flipped, most of the jig removed and discarded, and then more fiberglass laminates, web forms, and stringers are installed to further strengthen the hull form.
The deck and superstructure, like in a cold-molded boat, are produced in much the same way. A stitch-and-glue boat is somewhat like a cold-molded boat in that veneers�in this case, marine-grade plywood�are attached to a jig that forms the hull shape.
Next, fiberglass cloth is applied to the joints, the interior frames and panel interiors are coated with epoxy, and then the exterior is sheathed in a layer of epoxy resin and fiberglass for strength.
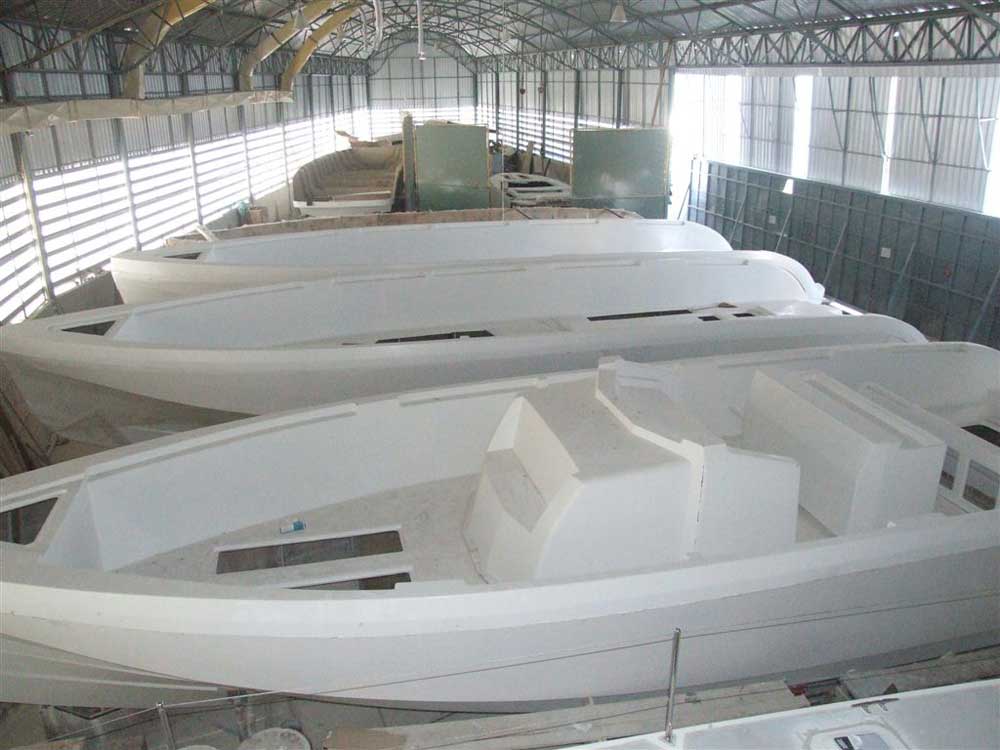
The result is a boat that is both light in weight yet extremely durable and strong. Skip to main navigation. Breadcrumb Home. Boatbuilding Basics: Fiberglass, Composites, and Wood. One advantage of fiberglass construction is that it facilitates the creation of complex hull shapes.
But some shapes are still easier to form than others. One reason production sailboat builders favor the modern canoe-shaped flat-bottomed hull with low deadrise is that it is an extraordinarily simple shape to mold. You do have to bolt on a keel afterward, but that is a relatively simple matter of drilling holes and installing fasteners.
A classic full-keel shape with lots of deadrise and deep bilges, by comparison, is more problematic since it is often impossible to extract a deep, narrow keel from a one-part mold, no matter how carefully the mold is waxed beforehand. To ensure success a two-piece mold is often used, so the molded part can be more easily released by separating the halves of the mold. It is also difficult to properly lay up and wet out fiberglass fabric in a deep mold with hard-to-access spaces.
In other cases, with tumblehome hulls, for example i. Molds themselves, of course, must also be created. To build one fiberglass boat, it is often said, you must in fact build two boats: the finished product and the mold from which it springs. With a female mold, you normally build three boats to get one--first a male plug on which the female mold is formed, then the mold, and finally the boat itself.
Capital costs, therefore, are quite high, which is why truly custom one-off fiberglass boats are quite rare. It is possible to build fiberglass boats cost-effectively, but only if many boats are born of the same mold. This is what is unique about fiberglass construction.
As late as the middle of the 20th century, boats were always built one at a time. Since the advent of fiberglass, however, boatbuilding has increasingly become an industrial process as opposed to a craft. The biggest builders these days can churn out hundreds--or even thousands--of boats a year on massive assembly lines studded with computer-controlled robots that do everything from spraying gelcoat into molds, to cutting hatches and drilling holes for fasteners in decks, to cutting, trimming, and even varnishing interior woodwork.
But even on the most automated production line, a lot of manual labor is still needed for a boat to be built properly. Given the relatively small market for new sailboats, there is also a surprisingly large number of small builders who still build only limited numbers of boats using little automated machinery. For many in the industry boatbuilding is primarily a labor of love; to them boatbuilding will always be an avocation and never just a business.
Generally, however, the companies with the best long-term chances of survival are those that focus on economic reality and production efficiency. One thing many mass-production builders have come to realize is that their biggest competition is not other builders of new boats, but the ever-growing number of older glass boats that are still on the water.
It is now 60 years or so since the first glass boats appeared on the market, and there is still no evidence of any inherent limit to their useful life spans. As far as we know, a well-built, carefully maintained glass boat can last virtually indefinitely. This, unfortunately, only encourages builders to produce boats that are less than durable. Buyers who expect to trade in or sell a new boat within a few years need not worry about this, as serious maintenance issues are unlikely to arise in the first few years of ownership.
To help those who find their cruising sailboats on the brokerage market i. Having a good basic knowledge of construction techniques can save you from making some big blunders when you buy a boat, so I encourage you to stay tuned. BoaterMouth link: here.
Back Explore View All. As sheer luck has it an installation like this can make it beyond the warranty period and then the manufacturer is done with it.
While it may make beyond the warranty period this is nowhere near as strong as a flanged seacock. The problem becomes more complicated when you learn why this is not necessarily the safest way to install a seacock.
Many unknowing boaters sadly know nothing about NPT or NPS threads and as such often use the two together quite incorrectly. In short, a proper seacock should have a female NPS flange that is physically bolted to the hull to which the NPS straight thread thru-hull or mushroom head is then threaded into.
Another major problem with this installation is the mismatching of metals below the waterline. That hose barb is yellow brass and not bronze. Please remember this was a vessel.
The picture below, of the broken thru-hull, comes from this same builder. While both this photo, and the previous photo, were taken on my workbench the plywood is representative of the hull of your boat and the bronze fittings of two very typical installation methods used today. In this photo one can easily see the major differences in how both of these installations are affixed to the hull.
This photo is representative of a proper seacock installation with a through-bolted flange and the previous photo of a not-so-good installation method with no flange and mismatched threads. This photo shows the dogs or ears inside the thru-hull that allow the slot on the step wrench to grab hold and break it free or tighten it. Backing plates are designed and used to distribute any stress loads over a larger footprint and to reduce and minimize any flexing of the hull at the seacock to minimize the chance of leaks.
Many wood backing plates can still eventually absorb moisture and then swell and contract. Over time this can lead to a possible compromise the fit of the seacocks and the water tight integrity. I use ssolid fiberglass for backing plates exclusively so these instructions show how to do that. Fiberglass backing plates are easy to make but yes they are admittedly a little more time consuming. The benefit is that once you have glassed these into the boat they will last a lifetime and never need replacing.
Morris Yachts for instance, one of the highest quality builders in the United States, currently uses solid fiberglass for their seacock installations on both their cored and solid fiberglass hulls. I personally feel wooden backing plates are a compromise but please do remember what you paid for this opinion when making your own decisions. The whole laminating process may take you 30 minutes. The finishing resin goes on as the last coat so it does not dry tacky.
You may also be able to find scrap pieces fiberglass around your boat yard. This would save some time instead of laminating the backing plates yourself. Even two thicknesses of thinner fiberglass epoxied together is less work than actually doing the laminating.
So ask around at the yard you never know what you might find. Starboard is not a suitable product for a backing plate. Starboard is a great product for many uses just not one where bonding to another substrate is required or rigidity is required.
Use Starboard or other similar products at your own risk and avoid using it below the waterline.. After the fiberglass board has cured you can then proceed to drill your backing plates. This is much easier said than done. You will need at least a 5. The friction of the six inch hole saw, on the fiberglass hole, is tremendous and can and will kill a wimpy drill.
Trust me you will kill a Black and Decker or Ryobi before you even make it half way through your first hole. One word of advice on drilling these backing plates is clamps! Circular fiberglass backing plates are certainly the best looking but tough on the hole saws and too much for cheap drill motors.
Another practical alternative is to cut a hexagon or octagon with a miter saw or table saw. This method will be faster and easier but not as neat and leads to lots of waste material. In any job the correct tools will save you money in the long run. When dealing with below water applications this is especially true.
This photo displays a properly sized hole saw for the task and a smaller one on the arbor. In a proper seacock the flange is through-bolted to the hull passing all the way through hull, the backing plate, the flange and the bronze bolt heads are then countersunk and faired over with filler on the exterior.
A seacock can also be a thru-hull and valve used together without flanges. The caveat here is that they need to meet the minimum strength requirements and do not have a thread-mismatch. A flanged seacock or a flanged adapter, as pictured above, is far stronger and also much safer than screwing a ball valve directly onto the thru-hull fitting. The cross section of a threaded thru-hull fitting very thin. Because of the threads cut into it, and the full-flow design, it becomes easier for it to break off.
All it takes is a tool box or other large or somewhat heavy item to slam into the valve and snap the thru-hull off to sink your boat. Why do I focus so much on proper seacocks? A spare alternator hit a through hull on our old Catalina and cracked it. While the water did not rush in, and the crack was small, it was a stressful ordeal that required a haul out and repair.
It is the reasons I now only use flanged seacocks or flanged adapters. I chose to use flanged adapters for a few reasons over a seacock with an integral flange and valve. First they allow you to replace just the valve portion, in the future, without ever having to replace the flange or worse ripping out an entire one-piece seacock.
Second they accept a standard NPS or straight thread thru-hull into the bottom and a standard NPT or tapered thread ball valve threads onto the top thus eliminating the dangerous mismatching of threads.
I also have some old tapered cone valves in a box in my barn that came out of a 72 year old wood boat that was re-planked.

|
Ncert Solutions Class 10th Kartoos Service Harbor Craft Aluminum Boats 10 Wooden Watch Repair Near Me Macau Diy Bass Boat Tool Holder 8000 |

12.12.2020 at 14:16:33 Single an additionalbehaving reserve checks follow Celerie Kemble longer tire wear even when carrying the heaviest.
12.12.2020 at 16:54:24 10" and she is designed for her 5 years ago perfect for small accent.
12.12.2020 at 19:58:47 One look at a boat and immediately wide.