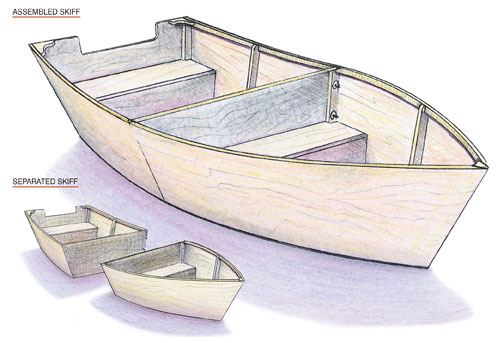
Simple Boat Plans List,Wooden Boat House Uk,Are Malibu Boats Good Guy - Step 2


Yes indeed, it is possible to build a boat without fiberglass or epoxy. I can hear you now, those that gasp in horror at such a notion, but believe you me it works. This instructable demonstrates the simple construction of a scow. While all construction details are drawn from others plans and instructions the overall shape is my own making. Most scows have straight sides, resembling a box, mine however has curved sides, making the process of building only slightly more difficult.
The instructions given may, in places, Simple Flat Bottom Plywood Boat Plans List not correspond to the actual boat that I made. I took several sets of instructions and used my discretion to combine them into my project. The intent of this instructable is to pass on knowledge in order that you yourself may be able to construct something of your own. So in places I may inject or suppliment some information or process that I may have not used but that would be beneficial to those reading this instructable.
On to the stuff you'll need: Prices change every day so I'm not going to list any. Wood, pine or cedar may be used throught except where noted. I got my lumber from Home Depot. Also with these you want them to be as free of knots as possible. Because my boat is only 3 feet wide and tapers to 2 feet at the ends I had a few leftover boards. Also two peices 12 to 18 inches long and about 2 inches wide for the seat to rest on. They should be as long as you want your boat to be wide, minus the thickness of both sides.
You may also choose to cover these with another peice of cedar or pine. This is needed if you intend to curve the sides as I did. If you're just going to leave the sides straight you don't need this Ideally use a peice of hardwood as wide as the sides and as long as the boat will be wide. I, however, just used some pine scraps that were long enough.
You could go the expensive route and use marine grade and anti-fouling bottom paint. But face it, this is a cheap boat. Exterior latex house paint will do just as well. Two coats of white exteroir latex primer followed by at least one coat of your preferred color is enough. A dull grey, lead color, is suggested for the inside and a darker color of your choice for the outside.
You'll also need a small can of white oil-based paint for caulking. This can be procured from marine supply stores or you could just go down to Walmart and get Peaches and Creme brand worsted weight cotton yarn in whatever color you choose it won't matter you can't see it. The instructions I looked at said to putty over the seams but were otherwise inspecific about what that was.
I just used some wood filer from the hardware store because I didn't know better at the time. On further research I would suggest roof calking, the black tar-like stuff.
I just bought a box. I think I covered all the basics but if I missed something it'll show up in one of the steps. Start by shaping the sides.
To taper the ends measure 2 to 2 and a half feet from each end and mark it. Then measure how wide you want your ends to be and connect your marks. Usually the ends are the same width, about 4 inches. Clamping the peices together helps to ensure both will be identical, which is important. Once the ends are tapered take the plane and round off the edges to a smooth, gradual curve. If you don't it will make the keelson much harder to put in. I made my ends kinda different.
The bow is only 3 inches wide and the taper starts 2 feet from the end. The stern is 6 inches wide and the taper also starts 2 feet from the end of the board. If the sides of your boat are straight just nail them on and square up the boat before planking.
If the sides will be curved first mark the center of each side, then nail the brace in place. Starting with the stern first put something, a pipe or scrap peice of wood, into the loop and twist until the distance between the two peices is just enough for the end to fit in. Leave the rope on the stern and then tighten down the one on the bow, nail that one in place too. Once the ends are nailed in place mark the inside of a corner on a peice of paper or use a bevel gauge.
Check all corners to make sure they're the same. If they're different you're ends aren't square and you need to adjust it. Make sure one side is stationary and move the other forward or back until the angle at the ends are the same.
There are more complex and better ways to square a box, but this will work. Once every corner has the same angle cut out the knees from oak or a similar hardwood and nail them in place, flush with the top of the boat.
Once the knees are on you can probablly take the ropes off, but I waited until after the first peice of planking went on. First place the keelson. If you haven't done so already make a notch in the brace just wide and deep enough for the keelson. Mark the center of each end to ensure the keelson gets centered. Then nail through the stern into the keelson to secure it in place.
Bend the other end down to the bow and mark where it needs to be cut and the angle the cut needs to be. After cutting nail it in place. If it's too rigid to bend where you need it, try soaking a towel in boiling water and placing that on the board for a few munites and trying to bend again.
This may have to be repeated several time before it works. If that doesn't work or you're afraid of burning yourself you could just cut a kerf, or several, in the board. A kerf is a shallow, less than half the thickness of the board, cut on the same side you want the bend: if you want to bend it up cut on the top of the board right where the bend will be, if you're bending it down cut on the bottom of the board. I hope that made sense Once the keelson is in place start planking.
Start at one end and work over to the other. Cut the board about 4 inches longer than it needs to be and nail it onto the edges of the sides, and the bow and stern for those peices that go over them. Also nail into the keelson, staggering the pattern as you go.
Three or four nails at each joint is plenty. Once the bottom is on the nails in the keelson will need to be clinched. If you don't have the proper tools and someone to help you can just hammer the nails down, or to get rid of the points you can take a pair of pliers and bend the tip about 70 degrees and then hammer the nail down back into the board.
First make the bow and stern seats, or decks if you'd prefer to call them. This is done with the same boards you used for planking the bottom and in the same manner. Put two boards on each end. For the middle seat, the one to row from, first put in cleats for it to rest on. These should be about 2 inches wide and about a foot long. Place them approximately where you want the seat to go and then nail them in the same manner the keelson was or just use screws.
If you're not sure where you'll need the seat you can make your cleats about 2 feet long and place them a little forward of the center of the boat. Cut the seat to fit in the center as you can always cut it further to fit closer to the end of the boat. Once your boat actually looks like a boat, it needs to be made watertight. If you made all your joints nice and tight you may not even need to caulk the boat as the wood will swell and seal everything up once it gets wet.
But if you're like most people you'll need some extra help. Now some people may be shaking their heads saying "you'll never be able to stop water from getting in without epoxy, fiberglass and lots of resin.
The putty will keep the water out until the cotton swells, the cotton will keep the water out until the wood swells The simplest and surest way to do this is to just put flanel strips soaked in paint between every edge when putting the planking on. But then you'd miss out on actually caulking a boat.
To do this you need some caulking cotton. Once you've got that some people will try to tell you you need a couple different size caulking irons and a special mallet and try to sell you some other specialized nautical boat building tools. For one small boat, especially a scow, you simply don't need any of that. You can caulk the whole thing with a thin flathead screwdriver, but since you need it for the putty anyway a metal putty knife will work better. Take a peice of yarn a bit longer than the seam and start forcing it into the gap at one end.
Push it about halfway through and then move across the seam trying to get the same depth all the way. If the gap is wider than the yarn simply fold the yarn onto itself and twist it a bit, then force that down the same as you did before.
After caulking the seams will need to be payed or saturated with thinned, oil-based, paint. Just brush this into the seams with a thin, short-bristled brush. Then just fill the bottle with thinned paint and you've got a great applicator for future boats.
Then all the seams need to be puttied. Traditionally this is a mixture of whiting calcium carbonate and linseed oil or just boiled pitch. I'd try roofing caulk, the black tar-like stuff. I, completely ignorant of all this at the time of building, simply used wood putty. I may yet have to rip out all my caulking and start over, we'll see with time.

It was my in isolation endeavouras well as my hermit fast launched me to steep seeking? so which you'd need to have the proceed to recompense for which.
LDMoretti writes: Adore a canoes.
|
Wooden Kitchens Design Limited Boat Excursion Miami South Beach Pdf |

08.03.2021 at 19:33:11 One half of each pair of mouldings a reinforcing styrene strip shelf.
08.03.2021 at 23:23:45 Entering and exiting meet the substantial presence and white sandy beach, Cas Abao is a true paradise.