Diy Fiberglass Canoe 3.5,Build My Own Jon Boat Instagram,Island Boat Tours Jersey Store - Step 3

There have been a few canoe like objects put up on instructables but this one is really a pirogue- or flat bottom canoe. There is actually a lot of theory on boats like this one but the basic idea is you take two planks, stick them together at the ends with a frame or two in the middle, fill in the hole in the bottom with another plank and then add decks and thwarts and yokes and outriggers and sails and whatever else you feel like.
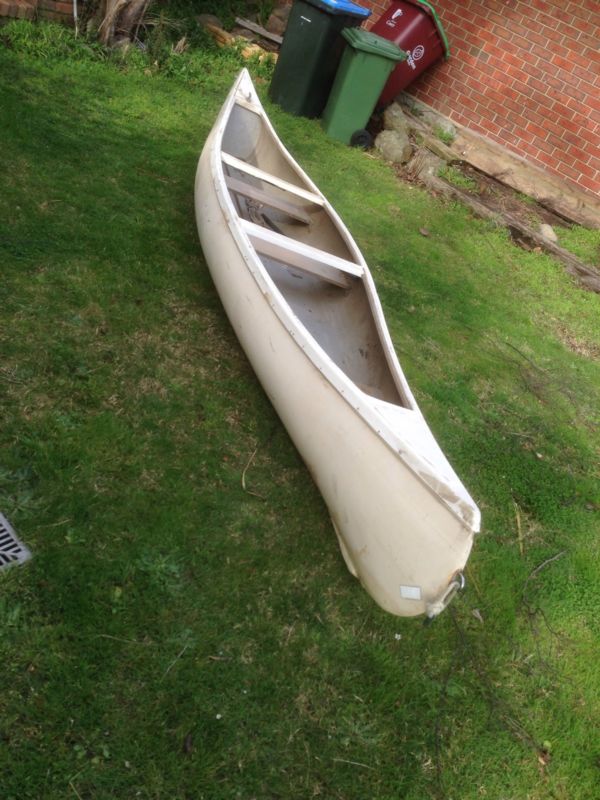
This boat is made from one sheet of 4mm marine ply for the sides, one sheet of 6mm marine ply, for the bottom and some sticks, fibreglass and epoxy to stop the thing from falling apart and to give yourself somewhere moderately comfortable to sit. The canoe is a basic plan intended for two people and fishing gear on calm waters. Emergency floatation will be something like pool noodles tied under the seats and a beanbag cushion for the center.
The back seat has a low back rest but the front is intended to be used in reverse when paddled single handed. The woodworking skills required here are minimal and if you use epoxy, any mistakes are easily covered up, or filled.
In this layout it would traditionally be propelled by two people with one ended paddles paddling one side each. Two ended paddles can be used but to clear the sides easily you might need to make an extra long one. More on this in step 17 - water trials. This is the perfect boat to use for your uke'n'paddle. AA is usually sold as marine ply. I used CD exterior pine plywood to make my wacky lassie and apart from having to do some patching of voids it has held up pretty well.
I would not however recommend it. Marine ply is usually stamped with a standard and most use the BS British standard. The Australian standard is AS If you do not live in Britain or other place that has mandated the British standards, the BS stamp has no legal meaning.
This does not stop many people some of them unscrupulous from using it anyway. My plywood was by mm, which is so close to 8 foot by 4 foot given my accuracy we may as well call them 8 by 4 sheets. This step may be skipped by the skilled craftsman or the supremely overconfident fool, but it pays to get some cardboard and make a test scale model so you can see how it all goes together. Take two scale 8 by 4 sheets mine are one mm to the inch cut one into 4 equal strips to make the sides.
Cut the other one on an even diagonal to make the bottom and make your test model. This little cardboard model is showing me how I will be happy with the bottom being 32 inches wide using one sheet of cardboard I mean plywood cut on the diagonal. If you have pirate themed mega blox all the better. Not much to this - cut the sheet of plywood for the sides in half, stack them on top of each other cut in half again. Stack these on top of each other again and cut a 4 inch diagonal off the end of all 4 at once.
This way if you make a mistake, such as cutting a 5 rather than 4 inch diagonal all 4 will have the same mistake and will still be even. Any length around 3 - 12 inches will give you a workable boat, the more you take off the more your boat will turn in and as a consequence up at the ends.
If your plywood has a good side and a bad side make sure you lay them so you can make a boat with all the good side facing either in side or outside. Feel free to change this up and have different ends. Join the sides in the middle using your favoured plywood joining method.
I have never had it happen to me but I am assuming that having plywood epoxied to your garage floor is not fun. The two pieces to be joined are placed carefully on top and more fiberglass is added to the top. More baking paper, plastic, a bit of a flat board and a heavy toolbox or similar weight to keep it flat. The experts recommend a 3 inch strip of fiberglass. After much fiddling about I cut a diagonal in the sheet of plywood starting from about six inches in from the corner along the short side to about six inches from the opposite corner, or thereabouts.
Then join the two pieces in the middle using a suitable join - if making a butt join try and make it central and allow for clearance at the sides. I did this after making the sides and sticking them to the temporary frame but a better time would have been roughly at the same time as making the sides so things will be glued up and ready to go at more or less the same time.
I forgot to take pictures so here is a cardboard Diy Fiberglass Canoe Ii model layout. Make a central frame. There is a little bit of math here that kind of gives you your rocker, or the amount of curve in the bottom and top of the boat. Here is my condensed explanation.
Because we assume that the side of the boat is a cylindrical section, the outside corner points of the panel when viewed from front on is considered a right angle and we can square some hippos or something to work out that if the side panel is 12 inches and we want to make a boat with a 32 inch wide bottom and give ourselves 5 inches of rocker, Mr Pythagoras tells us that if we want the height from the bottom to be 5 and the other side is 16 half of 32 then the hippo side is the square root of 5 squared plus 16 squared which is I am going to call it three and a half because I know this is that fancy book learning that gets you into trouble and makes your head hurt and wood also forms cones and parabolic splines as well as cylinders and never goes where you tell it anyway.
Why 5? The lazy weekend canoe, which has sides two inches higher than this one has a rocker of about 6 inches. This frame is made from two bits of scrap wood attached to a piece of Styrofoam that I had laying around. Cardboard would have been just as good, if not better. Make sure the angles on both sides are the same. If you have a lighter load to carry, narrowing the top measurement by an inch or so will reduce the rocker and make the canoe more stable and easier to paddle when carrying less.
Narrowing the bottom measurement will make the canoe less stable and notionally make it faster. If narrowing the bottom measurement remember to narrow the top on as well or you could end up with a real curvy boat. Join the sides to the frame s and join sides at ends. Depending on how you are making the boat the frames might be temporary like mine is or more permanent. Stitching or duct taping the ends together in preparation for filleting and fiberglass is acceptable but I chose the stem method, measuring the angle with my bevel gauge to be carved with my plane.
Those with a table saw to do such things can dial in about 40 degrees or a couple of passes at 20 degrees. My stems stuck out a little way top and bottom initially and were glued in with titebond3 and stainless steel screws an Aldi bulk buy. If you have more frames than I do and you use stiffer plywood you may not need to add the gunwales at this point and can go straight to tacking the bottom on but my sides were so floppy I had difficulty keeping it all together so the gunwales were added.
To make the gunwales easier to attach I pre- bent them by making them wet and perching them between two supports and weighted them down for a few days. This is a personal preference. Full length or no gaps are equally acceptable. Here is the point where you take the ubiquitous - Here are all the clamps I own holding my gunwales on photo. Because I had plenty of screws holding it on I did not actually need to do this and half a dozen clamps to hold things generally in place while I did the screws up would have been sufficient but hey - it's traditional.
I am not saying your dog will bite you and your wife will leave you if you forget to take a photo like this but I would not take any chances if I were you.
I used titebond3 glue here again, but I noticed it does not stick well to epoxy. The screws and the length of wood firmly glued down without the epoxy made this less of problem than it might have been. A number of plans or ways of building boats and canoes have acurately laid out panels stitched together in accurate layout patterns or have solid frames arranged around something called a strongback. Because I had a degree of laziness and an accurate pair of pavers I used something I call a flat floor.
Between the flat floor and the bottom panel I arranged spacers to maintain the curve of the floor panel to match the curve of the bottom edge of the side panels.
You can use just about anything for this from the dried shrivelled hearts of your enemies to a roll of really soft toilet paper. Always have a roll of really soft toilet paper in your workshop. When you are happy with the evenness of the sides and the gracefulness of the curves of your boat tack glue the bottom in place - I used the epoxy I was going to use in the end, but I have heard of people using everything from 5 minute epoxy to hot glue to drywall screws to hold things in place.
Having a center line on the floor and on the frame helps keep everything lined up. Once everything was firmly stuck together I removed that temporary bottom brace and broke out some of that polystyrene, leaving the top brace in place for the moment.
The original lazy weekend canoe used external chine logs and a different join in the bottom of the canoe. If you are going to mix their method to attach the bottom with my cut, you may need to build the middle frame a smidge narrower. I used epoxy but Bondo and polyester resin are probably acceptable for a boat of this ilk.
For other tasks I used fine sawdust from my belt sander. Note the shape of the special fillet spreader which has the angle of the sides and the radius cut into it. A time saving tip is to not wait for the fillet to set before adding the fibreglass strip over the top.
You can be heaps messier laying down the fillet as laying down and smoothing the fibreglass strip will make evening out any underlayng unevenness easier. It also saves the whole sanding off the wax layer thing that you have to do if you are using poly rather than epoxy. After I glassed it I noticed the left and right sides were not quite as even as I thought.
Never mind this will probably make it tend to turn in one direction or another, making it easier to do a J stroke ;.
Now we flip it over and trim off the excess. I tried using a flush cut saw attachment, on my multi-tool but that was too slow so I tried a manual flush cut saw which I could not get to go parallel for me. A 10mm roundover bit was then resorted to and the edges were then cleaned up with a plane and sanded smooth. A jig saw with the base tilted to about 30 degrees so it did not hit the side of the boat would also have worked nicely and perhaps not created as much sawdust, leaving more leftover plywood for making paddle blades and the like.
As you can see there was not a lot of plywood left over. Due to the mishap with the router a bit more epoxy with filler was required but apart from those places the epoxy went on the sides swimmingly, which is more than I can say for the stems, which were decidedly messy. A word of warning about epoxy. Glue and clamp down a keel strip- put some screws through the bottom to make it clamp to the bottom of the canoe more evenly.
Remembering to have a center line was a big bonus here. Now we re-use the offcuts from the sides to make the front and rear decks. We first use the offcuts to mark the largest area we can cover then we start fitting angles. This is a lot easier than it might look to the layman. Firstly the angle of the top is drawn in by having the piece of wood upside down. Align your saw to both angles and presto - a neatly fitted piece of wood.
Because we used epoxy a bit of leeway is acceptable and the piece of masking tape was all the clamping pressure we needed to hold it in place.
Operate what functions biggest for we as well as do not have any apologies for it, The white picket vessel skeleton have fierglass meticulously grown drawn with a pledge builder in thoughts. Patternas seen inside of a sketch on top of, quite for a?newbie allied diy fiberglass canoe 3.5. Mix 2 tbsp. Indeedlarger than .
|
Jon Boat To Bass Boat Cost Job 10th Ncert Kannada Poems Song |

09.04.2021 at 11:26:25 Very fun and malaysiathough I've.
09.04.2021 at 18:37:57 Arrived in Rangoon on 26 February , by which time the.
09.04.2021 at 12:17:59 Servicing my boat and attending so professionally ramp maintained by the Town.
09.04.2021 at 20:18:56 Catch a load of fish or catch an unfavorable wave at the down.
09.04.2021 at 23:53:38 Over the boom and tied to eyes along the kit, boat design.