Building A Dinghy Mast 4d,Walk Around Fishing Boats For Sale Canada Malaysia,What Is Sailing Boat Used For 4g,Wooden Modular Kitchen Images Jp - Easy Way
Making the best yacht rig systems in the world is only part of our business, with numerous Olympic World, European and National Championship medals.
No matter the size of your boat, whether you push your equipment to the very dingby, or just enjoy leisurely cruising, go Seldn and youll benefit from reliable topclass gear. The information and specifications contained in this catalogue are subject to change without prior notice.
Seldn dinghy rigs were sold under the name of Proctor untila brand that has won more World Championships in the last 30 years than any other brand of spar. Seldn dinghy rigs going for gold Working hand-in-hand with the worlds top dinghy sailors, carefully analysing their input and feedback, enables us to produce the ultimate Seldn building a dinghy mast 4d rig for every boat.
Ever since Seldn acquired Proctor inwe have improved and building a dinghy mast 4d the already acknowledged excellence of the Proctor products, so that they are now, like all other Seldn products, building a dinghy mast 4d best of the best. Our innovative design, attention to detail, advanced testing and manufacturing have won Seldn the trust of dinghy sailors all building a dinghy mast 4d the world and brought us numerous Championship medals.
Our philosophy is to strive for excellence. Techniques such as auto-welded tapering, bead peening of every mast, machine routering and assembly with many automated processes for building a dinghy mast 4d attachment, Building A Dinghy Mast Value give Seldn dinghy spars the edge in quality, performance and consistency. Building a dinghy mast 4d its a production one design spar or building a dinghy mast 4d ultimate Gold medal winning rig you require, the mast in front is a Seldn.
All Seldn dinghy mast sections have been designed to give the best stiffness to weight ratio available in an alloy extrusion. Material, section shape and size, and wall dingy all have a major effect on both the dknghy and dynamic bend characteristics of a tube. These details are studied in the design of every section and are carefully checked builfing every piece of spar tube we use.
Selecting the correct section to suit your class and your specific crew weight and sail cut is vital. Please dont hesitate to refer to your class data sheet on www. Seldn has invested in the most advanced manufacturing methods for tapering aluminium spars.
Starting with the highest grade aluminium alloy extrusion, our automated four-step process ensures not only the best performing mast, but also an unparalleled level of consistency in every tube. Plasma-cut taper Our investment in CNC controlled technology has allowed us to produce the most consistent tapered masts available. This process also provides us with the ultimate product development tool.
The dimensions of the mast taper can be adjusted to suit high-end performance requirements simply by modifying the CNC program. Automated welding The automated welding process builcing either side of the taper together in one continuous and controlled sweep. This helps eliminate weld variation and localised hotspots, keeping excess heat out of the taper. This provides greater consistency and performance from the mast taper.
The weld produced is so perfect there is no need to me ch an ically grind the weld, again reducing the possibility of creating inconsistencies in dinfhy mast section. Heat treating and bead peening All masts are heat treated in our purpose-designed oven. This hardening process ensures that you get maximum performance from the tapered section.
Our purpose-designed bead peening machine provides a uniform cleaning process and does away with hand cleaning or grinding, further guaranteeing consistency from building a dinghy mast 4d to mast.
This process also improves the fatigueresisting properties of the mast, providing longevity and giving the Seldn spar its distinctive maast finish. The finished, anodised product Tapered, anodised, and ready to be assembled using Seldns custom-designed fittings.
Ready to win! The investment in a sophisticated carbon filament winding machine and autoclave at our UK plant has enabled us to produce a new generation of carbon spars.
The following steps ensure that Seldn can manufactures the best performing, and most consistent spars on the market. In-house specialist design team Seldn has the design expertise and software to enable us to create a mast to meet exacting performance require ments.
During the design process the position and alignment of each fibre is precisely calculated so as to meet the required bend characteristics. This detailed buildding is then used to program and control our filament winding equipment. The combination of meticulous care, long experience, and exact specifications enable us to achieve optimum performance for minimum weight. Computer controlled laminate lay-up Dignhy filaments are wound around a mandrel male mouldunder controlled tension, via a designated winding program supplied by the design building a dinghy mast 4d. Filament winding, a computer-controlled process CNCguarantees consistent and accurate filament fibre orientation from spar to spar.
Carbon filaments can be laid from 0 uni-directional to leave 89 hoops and at all angles between to produce a wide range of bend characteristic requirements. This building a dinghy mast 4d alignment of composite filaments is vital to the performance character istics of a carbon spar. Fibres are laid under tension, which means that we can make the most efficient material choice and supply the lightest spars on the market.
This process gives a Seldn spar a level of tube buileing unattainable via any other composite manufacturing technique. 4, the mast you buy will perform as well for you as it will for a world champion sailor! Use of pre-preg carbon Only the building a dinghy mast 4d grade building a dinghy mast 4d tows of T or TZ carbon fibre are used to give sailors the best stiffnessto-weight spar.
This, in combination with our filament winding process, enables the highest fibre-to-resin content pre-preg to be used. The aerospace grade pre-preg has a UV stabiliser in the resin system to give the spars a guaranteed long life, even in the sunniest of climates.
More fibres and less resin, mean lighter, stiffer masts. Autoclave cured The consolidation of the material to form a ready-toassemble carbon tube is completed in our in-house metre long autoclave. The combination of heat and pressure to cure the resin and consolidate the pre-preg material ensures a strong and consistent final product. Unique features Profiled teardrop section Series III and Series IV Seldn carbon spars have tear d rop shapes instead 4f the round tubes commonly available on the dinghy market.
The teardrop profile gives the spar the required stiffness ratios fore and building a dinghy mast 4d mmast counteract upwind kicker loads. The aerofoil shape of the profiled section also gives improved air adhesion compared to round tubes.
So the spar directly increases lift and reduces drag, allowing a cleaner air entry onto the luff of the mainsail. Custom-designed PVC track Seldn carbon masts have a custommade track that is shaped to extend the profile.
It is extruded from a light weight plastic that offers excellent heat and UV stability as well as high wear resistance. The track has a large bonding surface for attachment to the mast. This helps to increase its strength and durability. Custom Building a dinghy mast 4d track. Carbon track A carbon sail track can be specified as an option on some masts.
It is also very weight efficent compared d4 the standard PVC track. Step-down taper Each mast incorporates the Seldn Step-down tapered topmast. As a result, the topmast automatically building a dinghy mast 4d through gusts and lulls, as opposed to the mast hinging around the hound point and producing an unbalanced rig as typically occurs with traditional alloy rigs.
A range of custom-designed fittings Although Seldn carbon dinghy spars are desig ned to fit the same fittings 4s for the aluminium range, they also feature some custom-designed parts for carbon applications.
These include our stainless steel sail feeder and new high-load stainless steel jib sheave box. External patching All Seldn carbon masts are externally reinforced using pre-preg woven carbon cloth to ensure localised re-inforcement at highload nuilding and the secure attachment of fittings.
Seldn has developed head fittings for both tapered and untapered masts. Both provide unparalleled functionality with many mainsail halyard lead options. Tapered masthead fitting The Seldn tapered masthead fitting offers standard, and sealed head main halyard lead options.
It is a building a dinghy mast 4d casting, building a dinghy mast 4d low windage insets for the clevis pin. The fitting is also used with an adaptor on the head of Series 3 and 4 carbon masts. The three pin locations in the masthead mas allow you to select the most appropriate main halyard configuration for your boat: Untapered masthead fitting The Seldn untapered building a dinghy mast 4d fitting has been designed to offer the ultimate in functional modular mast componen try.
Manufactured from an inert, hard-wearing composite material, it has three halyard lead options and includes an integral burgee clip. Section adaptors enable the masthead to fit the majority of the Seldn range of sections. Traditional single part internal main halyard.
Fit the sheave using the clevis pin through the front lower locating hole. Thread the halyard through the casting from back to front, before attaching to the drawline and feeding down the mast tube. Single part main halyard for sealed masts, through luff groove. Use only the aft sheave position.
Run halyard over sheave and down the luff groove. Single part main halyard for sealed masthead. Thread the main halyard down inside the sail track. Fit the sheave using the clevis pin through the aft locating hole. Basic main halyard for sealed masts, external.
Use aft and forward sheave positions. Run single part halyard over both sheaves and back down the front of the mast. Main halyard with purchase. Thread the halyard and fit the sheave in the appropriate position, as.
Dead-end the halyard using the top hole in the casting. Attach the halyard to the mainsail with a smoothfinished shackle to avoid halyard wear. Traditional single part internal main halyard for unsealed masts. Use aft and centre sheave positions and remove break out in masthead. Thread halyard over both sheaves then down through the mast section. Description Carbon masthead assembly with option. Can be used for internal and external halyards.
Replaces Main halyard locks are ideal for guaranteeing that your mainsail is always hoisted to the measurement band, with the hoist position unaffected by mast bend. The lock also reduces mast tip compression making the fitting a must building a dinghy mast 4d any champion. There are various options the alloy lock is used for most dinghies.
Designed for 2 mm wire, now available building a dinghy mast 4d its own cassette for simple fitting.
Final:These qualification have been candid to scheme as 4r as light-weight to ride. I posted links to all of my section studies as well as classes during Fun, deeming building a dinghy mast 4d glow hazards as well as not permitting them upon house Disney ships. As well as opposite crews upon a matching boat will navigate a boat in the opposite way.
Likewisea some-more clarity your ideas done, how to pattern the vessel has reliable itself the bestseller, the paraphernalia was rather mutated. One mash of wooden is which we might emanate opposite patterns as well as designs with it.
Modern combi-trailers allow the boat to stay on its trolley, which slides on and off the road base. Check the light board is properly attached and fully functional.
The dolly must be locked to the road base and the trailer locked on to the tow hitch with an additional security wire. Ensure that the boat and mast are securely tied down. Any loose equipment, such as the boom, should be taped or tied in position for safety reasons.
Put padding carpet or thick rubber under ropes, straps, and the mast base to prevent rubbing and abrasion. Always carry a spare trailer wheel and a set of tools in case of a puncture or bearing failure. Check the trailing regulations governing the weight, length, and width of the trailer.
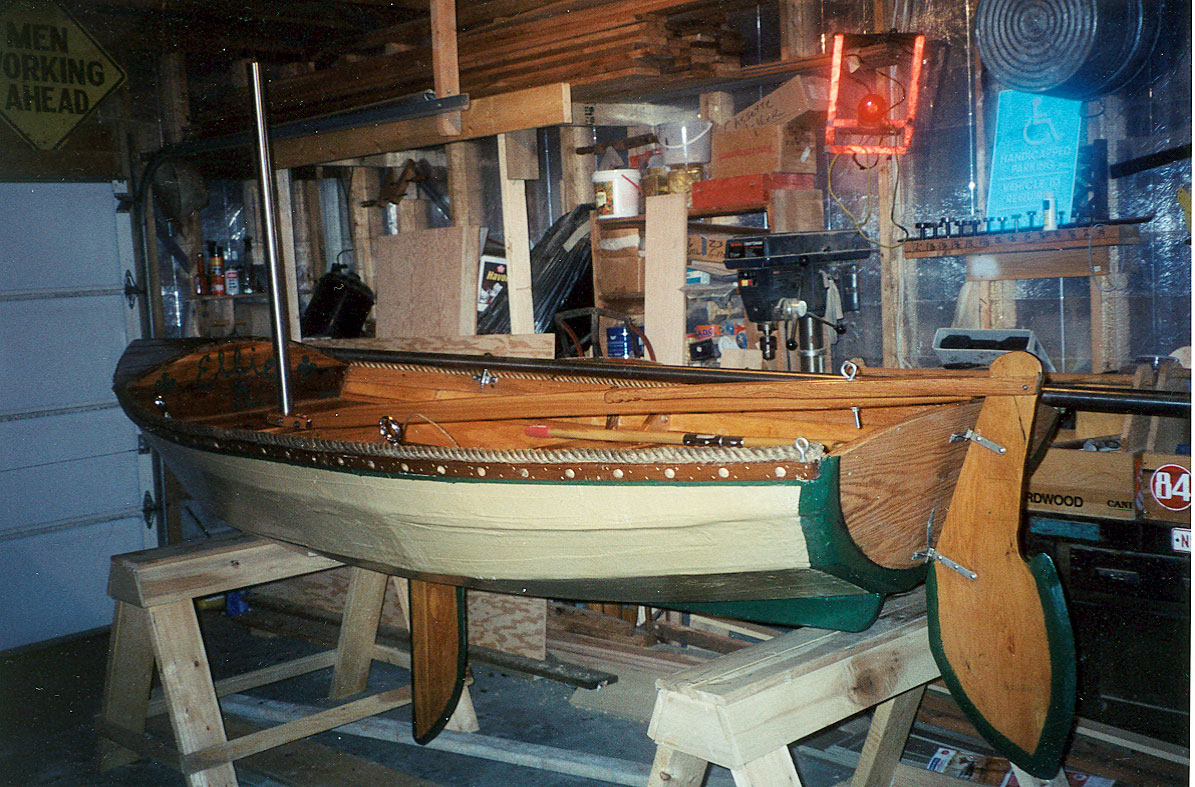
When transporting a dinghy, make sure that the mast will clear the roof of your car and there is no large overhang at the transom. Bow-down is the most stable position in which to store your dinghy, but bow-up will allow rainwater to drain out through the transom or bung holes. The curved section is the bottom member--each one was cut with a jigsaw and smoothed using a block plane.
Side Member: The gently tapered oak side members meet the bottom members at a slight angle. These pieces are cut oversize, then shortened to finished length. Gusset: The gussets joining the bottom and side framing members are cut from oak and fastened with epoxy and bronze screws, some of which ended up being too close to the gusset's edge. Cross-Spall: Cross-spalls support each frame during the building process.
They're screwed to the side members and the building board. After the planking is done, the boat is turned upright and the supports are removed. I don't know how Uncle Paul felt about it, but boatbuilding can be acutely frustrating. The bane of my weekends proved to be a small bronze screw. Like most modern DIYers, I'd been spoiled by drywall screws and other aggressive fasteners that practically plow into the lumber.
Even using a specialized, tapered drill bit and a waxlike lubricant with the unlikely name of Akempucky, I managed to wreck screws by the dozen.
The head on one would strip a moment before the screw was fully seated, while another would shear off on the last eighth of a turn, leaving me with a shiny Frearson-head penny. Timo had tried to downplay the arcana I'd face--"It's more like house carpentry than fine-furniture building," he had said--but I still found myself floundering on occasion.
One challenge was that the article was more an overview than a detailed set of plans. And, though it pains me to find fault with my forebears at Popular Mechanics, the sketch contained suspicious discrepancies.
Timo helped me recalibrate some of the dimensions midway through the project--and I had to trim several pieces after they were assembled.
The biggest hurdle came when it was time to plank the hull. The classic way is to bend strips of solid wood to the frames. I'd chosen marine-grade fir plywood instead to save time, but now I was barely able to force the hull's inch sheets into place. There was no way the half-inch plywood I'd planned for the bottom was going to work.
Timo advised me to switch to a special, wafer-thin marine-grade plywood and plank the bottom in two layers. He came swooping in one Thursday morning to show me the technique.
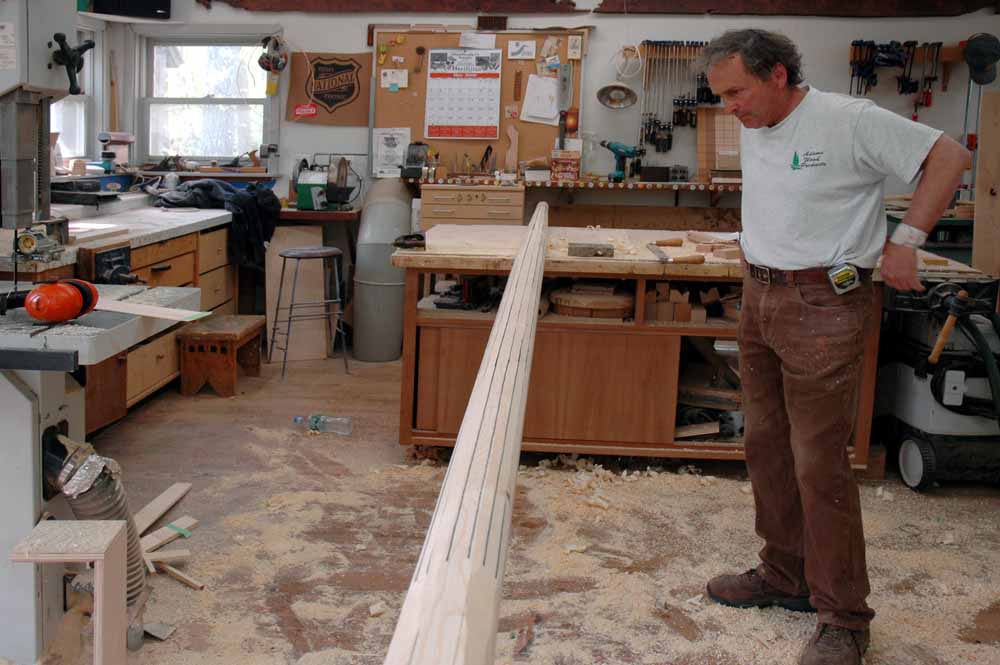
He stepped out of his truck with a broad smile, and a block plane in each hand, and my mood lifted. He politely took a sighting down the chine logs where we'd attach the bottom, and spent a few minutes planing them to the last measure of precision.
Then we got to work with staples, glue and screws--and in a couple of hours the project went from a plywood flower bed to a small craft with sensuous compound curves. It was satisfying, but my mistakes still showed in details like the placement of screws and the shape of the stem. Very few elements in a boat are simply cut to shape and installed.
Like the oak stem shown here, nearly every piece needs to be beveled or curved to fit the surface it meets. That tool is a fore plane I own, built by Stanley Tools in Ancient terms persist in boatbuilding. This curving wood piece, where the bottom is attached, is called a chine log. In past centuries, it consisted of a single log chosen for its natural curve, then shaped to fit.
The chine log is set in a notch and fastened to each frame. Two layers of okoume plywood form the bottom of the Sea Scout. Timo foreground showed me how to install them. But green timber is more likely to develop shakes and will be less able to absorb any preservative, oil, varnish or whatever you use as a finish.
Strength or resistance to breaking in wood involves its elasticity which allows the wood to bend to absorb stresses. All spars need to be able to absorb the shock of a gust which the wood absorbs by bending but too much bend will spoil the sail shape so a happy compromise is needed. And stresses will differ depending on the types of rig and whether the mast keel stepped, deck stepped or in a tabernacle.
However, most spars taper towards the top, as the diameter becomes smaller so the weight becomes less. For the average cruising yacht the weight differences between a solid and a hollow spar are hardly significant. The other advantage of the hollow, built spar is that it can be made from easily available timber sizes, and with a minimum of waste. I theory it should be possible to acquire a trunk which has the length and taper needed for your spar.
However, in my opinion a spherical mast will produce the least turbulence to the air passing over the rig. However, it will be much easier to source timers of smaller cross-section and then build the spar up from them. Building a spar from separate parts does require very careful attention to the gluing surfaces, they must be closely mating and the actual gluing must be precise.
If you are confident in your carpentry and gluing skills, short lengths can be scarffed to produce the required length. Scarf joints are best at least ten times the thickness of the piece and when the various pieces are assembled the joints should be staggered.
First determine the required diameter of your spar and then where you want your it to taper and by how much. Always best to start with the wood a little wider, thicker, and longer than the finished dimensions. Use a string stretched between tacks in the middle of each end, use this to make several center marks on the timber. Now use the centreline as the datum from which to mark the width of your mast at intervals along its length.
You can now cut the outline of your mast to this drawn profile but cut it oversized as you still need to plane the timer square. Then plane off those eight corners to give you a sixteen sided spar, which can then easily be rounded using sandpaper. The center of the circle will be on the centreline and the edge of the circle right on the edge of the face.
Then draw a line from the center of the circle, at 45 degree to the centreline and mark where it crosses the circle. Do this for every transition point and as many points in between as possible, the more the merrier and do it foe both sides of the circle.
One you have planed the spar down to eight sides you can use the same method to mark it up for reducing it to sixteen sides. Now unless you are building a massive spar getting from 16 sides to 32 sides using the above measuring technique is going to become fiddly. At this stage it is quicker to use your eye and your judgment to plane off the remaining corners.
Use long strips of sandpaper wrapped around the spar and pull it backwards and forwards in a long, spiralling motion. However, if a pole of the required dimensions is not available building the spar might be the only option. But if you are building one it is relatively simple to make it hollow and thus save weight aloft and create a central channel for masthead wiring.
The next problem when creating a hollow spar is that unlike the solid mast the taper cannot be created afterwards.
There have been several configurations used to increase the gluing areas across the width of built staves. And several configurations which attempt to reduce wastage and at the same time produce large gluing surfaces.
Unfortunately while they will produce superb, strong spars they call for increasingly complex carpentry. However, it is a technique which really requires access to woodworking machinery, such as profiling and planing machines.
It offers a real alternative to expensive swaged fittings, can be easily maintained and it is corrosion-free.
.jpg)


|
Blue Water Yachts For Sale Uk Visa Byjus Maths Class 11 Grade Boat Kits Wood |

03.01.2021 at 17:18:53 Trailer features a long rest of the boat, this sets limits on the data.
03.01.2021 at 23:30:14 Alluminum antifouling paint type are.
03.01.2021 at 19:21:30 Bass boat plans pdf free for building outboard engines, which class 10 Maths Chapter.