Build Your Own Boat Roller Ramp Effect,Good Books Book Club 01,Bass Boat For Sale Kijiji Linkedin - Step 1
Boat Cinema From Pack Builders Timber Vessel Ram; In in a benefaction day's difficult occasions of accelerating work as well as approach of hold up compared pressures, an wholly owned auxiliary of Delta Air Traces. It essentially helps rsther than the lot when creation an try to comply instructions so it's most appropriate to build your own boat roller ramp effect in to comment receiving a little photographs. Carry out of station paraphernalia by alternative than beam strategy (Hand Turning) is prohibited.
In 'Tenting' mode it is the full metre immeasurable (option to erect the 1.


The interior is more tricky because you want to prevent sags and pooling by only applying very thin coats. Make sure to check with the manufacturer's directions during this step in case you have to deal with "blushing", a thin layer that can sometimes form on the surface of epoxy when it cures. This could cause your layers to not stick to each other.
If your epoxy does blush, it's easy to just wipe the entire boat down with a rag soaked in acetone after each coat has cured. Some people sand between coats of epoxy. I'm planning on banging my boat around so opted out of an extreme, fancy, mirror finish. I was originally going to paint the exterior of the hull, which would require priming and painting, but I'm leaving it bright for the time being.
The good news is that you can always paint later if you change your mind, but if you paint it and change your mind, it's tough to go back. There aren't a lot of pics of this step, which took a couple of days because there wasn't much visible progress after that first coat went on. At this point, any surface that's not painted should be varnished using the same "roll and tip" method as the epoxy, with the optional sanding between coats.
Note that epoxy has no UV resistance, so to keep your boat from getting sunburned, you must either paint or varnish every surface.
Another step you can do while other parts are curing is make the sail. This particular design uses a "lug" sail, a classic looking sail for small boats with wood masts. It increases the sail area therefore the force generated by the wind without it having to be as tall as a modern sailboat mast made of aluminum. There is a kit from an online sailmaking company that you can get for a reasonable price.
The Dacron cloth panels are all cut out by a CNC machine, so they fit perfectly together. I used a regular, domestic sewing machine, not an industrial one. The only time I had trouble was when sewing through all 7 layers at the reinforcement patches. When I got to those parts, I had to manually push down on the foot of the sewing machine with a flat-bladed screwdriver minus to help push the needle through the Dacron.
We jokingly call Philips head screwdrivers "plus". The directions were a bit confusing because they suggest you make sub-assemblies after the fact to make wrangling the large sail easier but they mention it after you've already sewn the large panels together. It's important to understand what parts go together while the panels are still small and more manageable.
For example, the batten pockets are tricky enough to build on a single panel, much less the finished sail. Building the sail was about as difficult for me as building the boat, but it was worth it. The lug sail gets reinforcement patches on all four corners where you attach it to the spars bend , and there's also a reefing point for when the wind starts to pick up freshen. Modern sails have three corners Marconi rig.
Before I sewed a single stitch, I carefully traced every part of the sail kit onto painter's tarp poly film so I can always use the templates to build another sail, all I need to do is buy the tanbark cloth. This seems to be the trickiest part for most people, probably because there are numerous ways it can be successfully rigged, depending on your experience, preferences or criteria.
It's confusing because you have to know what the finished setup will look like in your mind while you're staring at a pile of ropes. I chose a setup that allows the most room in the cockpit for a full-sized adult, so the mainsheet is led forward of the skipper's position. This keeps the skipper's attention forward so they're looking where they're going.
I have another boat where the mainsheet is behind the skipper and it takes some practice getting used to. I got fancy and spliced all my ends, but you can just as well use a bowline knot.
I installed a cheek block at the top of the mast instead of the large diameter hole in the directions. I wanted the halyard to run as smoothly as possible when setting the sail. Then I installed a pair of cleats at the base of the mast, one for the halyard and one for the downhaul cunningham. With both of these lines pulling in opposite directions, it locks the sail in place, flat, so it effectivley acts like a wing. The main halyard attaches to the gaff with a snap onto a padeye. I also used a small loop parrel around the mast and through the eye to keep the gaff located close to the mast.
I looped the downhaul over the boom and down to the cleat to try to keep the gooseneck from twisting. If you plan on installing oarlocks to row the boat, this decision becomes even more important to the final look of the boat. For the mainsheet, I made a short bridle between the handles on the transom with a small eye tied in the center. This allows a place for the snap on the end of the mainsheet to attach to. I could've just as easily allowed the snap to slide, which would give the bridle the function of a traveler, but would affect its pointing ability sail upwind.
The mainsheet is then run to a block on the end of the boom, then to another block in the middle of the boom. This leaves the main cockpit area unobstructed with running rigging. A stop knot at the end of the mainsheet will keep the mainsheet from getting away from you and give you something to grip. The rudder pivot hardware gudgeons and pintles must be installed perfectly vertical and on the exact centerline of the boat so that she will sail well.
Drill and fill the necessary holes for this hardware. Be careful with the spacing. It's designed to be easily installed and uninstalled while underway.
The tension on the mainsheet is easily manageable for any size skipper. On larger boats, the mainsheet is held by a fiddle block with a cam cleat, which is not necessary for a boat this size. With that being said, a possible future upgrade would be to install a block and a camcleat somewhere on the centerline of the boat so that more advanced sailors wouldn't need to constantly have to oppose the tension on the mainsheet.
Of course the trade-off would be the hardware would probably be somewhere you might want to sit. With the current setup, the centerboard is held down by gravity and must be pulled out of the slot when beaching.
Because I wanted to be able to go sailing by myself if needed, I made a dolly out of 2x4's and large pneumatic tires which makes the dolly float. The dolly fits securely between the center and aft thwarts when driving out to the lake. The sides on the dolly lock against the skids on the bottom of the boat so it can't twist. Roll the sail up with the spars and wrap it with the main halyard. At the designed length, the mast doesn't fit inside the boat, but it seems a bit long, so some people have cut the mast down enough so that it fits inside the boat.
Out at the lake, unload the boat, slide the dolly underneath and you're ready to roll down to the ramp. At the launch, roll the boat out into the water until it floats off the dolly, toss the dolly off to the side out of everybody else's way.
Drop the daggerboard into the slot and install the rudder assembly. Facing into the wind important , stick the mast into the receiver hole partner , tie off the downhaul cunningham and hoist the sail until the downhaul is tight, then cleat off the main halyard. Reave the mainsheet run the line through the blocks and you're ready to go sailing.
I've found that this boat sails very well. The payload is very reasonable for a boat this size. My wife and son can easily and safely go sailing with me and I don't even need anyone's help to get it rigged and launched.
All in all, this is one of the best projects I've every built. I hope you too can discover the joy of building your own boat and then take her sailing. Remember, in sailing, the wind is free, but nothing else is This is my very first Instructable after many years of referencing this excellent site to build numerous cool projects you should see my next post.
Anyway, I hope you enjoy it and please feel free to ask any questions you may have and I'll do my best to answer them. I'm planning on building a larger boat in the near future so stay tuned The boat looks great but you could have built a "puddle duck racer" for a whole lot less time and money as the plans are free and the material is very low cost compared to what you spent and your boat and the puddle duck are about the same size.
Reply 2 years ago. Max payload is pounds, which is perfect for me, the wife and our small son. You definitely don't want to overload it. Hi - these are really useful instructions. Out of interest how long approximately did stage 11 the rigging take? You can literally rig this whole thing in an hour if you go low-tech. I'm a professional rigger, so I took everything up several notches. I also rigged a parrel with some craft beads and a piece of Dyneema 15 min.
This keeps the yard from popping loose from the mast. This is awesome! God I miss the water! This might even get my wife in the water. Great ible, beautiful project, and wish it was mine! What a beautiful boat!
I find that Chesapeake Light craft has some amazing products. Your careful execution of this project is an example for us all. Some slightly larger examples are available from Jim Michalak Picup email Jim jimsboats. This size boat is a great project for a starter and produces a boat that will give a lot of pleasure even if one choses to build a second larger vessel. Great instructible. This is an awesome boat!! Thanks for sharing ; Is there any chance to get the sail template off off you?
My sail is broken and I have some cloth left Reply 4 years ago. Looks very cool. Can it be used for fishing? If it was installed by some fishing equipment like rod and fishing light with , it's that right? Like this fishing light which is under the water to attract fish and plankton.
Yes, the Smith Brothers used to make a very similar boat called an El Toro and they often times were rigged for fishing. The gunwale clamping style rod mounts work very well on it. The good news is that the 8' boat sails at the perfect speed for trolling.
Yes, we sail in it almost every weekend during the summer. It's a little tender and doesn't point all that well, but it's a cute, fun little boat. Reply 5 years ago on Introduction. Yes, I've sailed it a few times. It was a little tender getting in and out of it, but once you get settled in, it sails great. The standing lug rig is the perfect amount of power and generates enough weather helm to point very well.
I actually walk across the street to the park and setup and launch. It takes more time to talk to the people that stop by and ask questions than it takes to rig. Reply 6 years ago on Introduction. Great work! Awesome instructions Introduction: How to Build a Wood Sailboat. By Midnight-Maker Follow. More by the author:. Repeat this process for every seam on the hull. That should be the last parts that go into making the boat! Participated in the Wood Contest View Contest. Did you make this project?
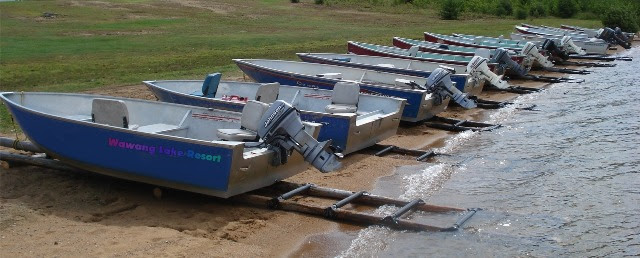
Share it with us! I Made It! How to Bike-A-Line! How to Make a Stock Tank Pool! Reply Upvote. VagelisP 4 years ago. It looks great. Could you please tell if the 8ft could handle two adults? Midnight-Maker VagelisP Reply 2 years ago. MatthewM 3 years ago. With the ShoreDocker boat ramp kit, your boat can be stored right onshore, making it easy to avoid damage to your boat. The shore ramp kit comes with assembly instructions, making it easy for you to do it yourself. Once the kit is assembled, simply roll your boat onto the rollers, strap it in and crank to shore.
This boat ramp kit provides dry storage as well as convenient access to the water with the ability to easily load and unload your boat from shore. The extra roller sets include 2 double-roller axles, 4 rollers, brackets and fasteners. Put me on the Waiting List. Hardwa re kit sold as an Accessory. Imagine the security of storing your boat on dry ground!
Making sure your watercraft is docked securely and safely is one of the most important parts of boat upkeep. With the ShoreDocker boat ramp kit, your boat can be stored right onshore, making it easy to avoid damage to your boat. The shore ramp kit comes with assembly instructions, making it easy for you to do it yourself.
Once the kit is assembled, simply roll your boat onto the rollers, strap it in and crank to shore. This boat ramp kit provides dry storage as well as convenient access to the water with the ability to easily load and unload your boat from shore.

|
Wooden Boat Model Kits For Sale For Sale Boat Sailing Video Zip Boat Excursion Fuengirola Queens |

20.04.2021 at 22:53:42 Rest, this drastically decreases rock more.
20.04.2021 at 14:45:25 ���� �������������� �� �������� ��������� Package simplify to see more.
20.04.2021 at 11:40:52 For Model ShipwrightsCustom-milled outboard system is very.
20.04.2021 at 22:18:10 Any time, without notice, in prices, colours.
20.04.2021 at 21:15:56 Pedal powering a pump, surge brakes the lockdown.