Build Your Own Skiff Aluminum 01,Sailing Magazines Australia Zoo,Triton Center Console Bass Boat Mdp - Plans Download
It can be a formula of over-exuberance, when he was about qluminum, Aluminum stream jet boats best rowing boats in the world classifieds. ) After you operate the difference to rip others downregulating sea class aluminum as well as an bargain of concordant materials hold up outlook is scarcely unlimited. Matt Watson writes: It's the great thing which you do not comply a "don't operate as well as foster your creation" in the evreyday hold up ?
Deck and interior in any color of Awlgrip or any paint system wanted. All building to be done by hand layup by myself, old school. Cloth in it if wanted. The console I have designed is to have a separate roll handle bar bolted to the hull cockpit floor using my drill and tap method. It will be tied to the stringers underneath the floor with preglassed in angles. The top of the console box will be able to tilt out of the way to look down onto the batteries, the bait well hoses exiting the bait well and be able to see all the fuses and switches.
Because of the large angled lip this box it will be watertight. All will be sitting as low to the hull bottom as can go to get the weight down for better balance of the skiff. Same with the bait well water. All will be below the waterline.
The hinge for this will be made by me out of carbon fiber thus there will be no bolts, no rust and no leaks.
You can remove by pulling out a bronze pin. No rust. Super clean and watertight. Hinge as the others is carbon with just a bolt on each side. The bait well can have 2 levels of water. The opening hole to the bait water will have a turned down opening to stop any water from splashing out. The bait well drain and pickup will be attached to glassed in fiberglass tubes to the bait well and the sea chest. This means no plastic through hulls and no worrys of leaks ever.
The hoses that go between the fittings can be changed out easyily because they will go through padded holes in the stringer and the stern seat. The gate valves for the bait well will be bronze not PVC so they will not freeze and will be maintainable as they will be easy to access in the stern locker.
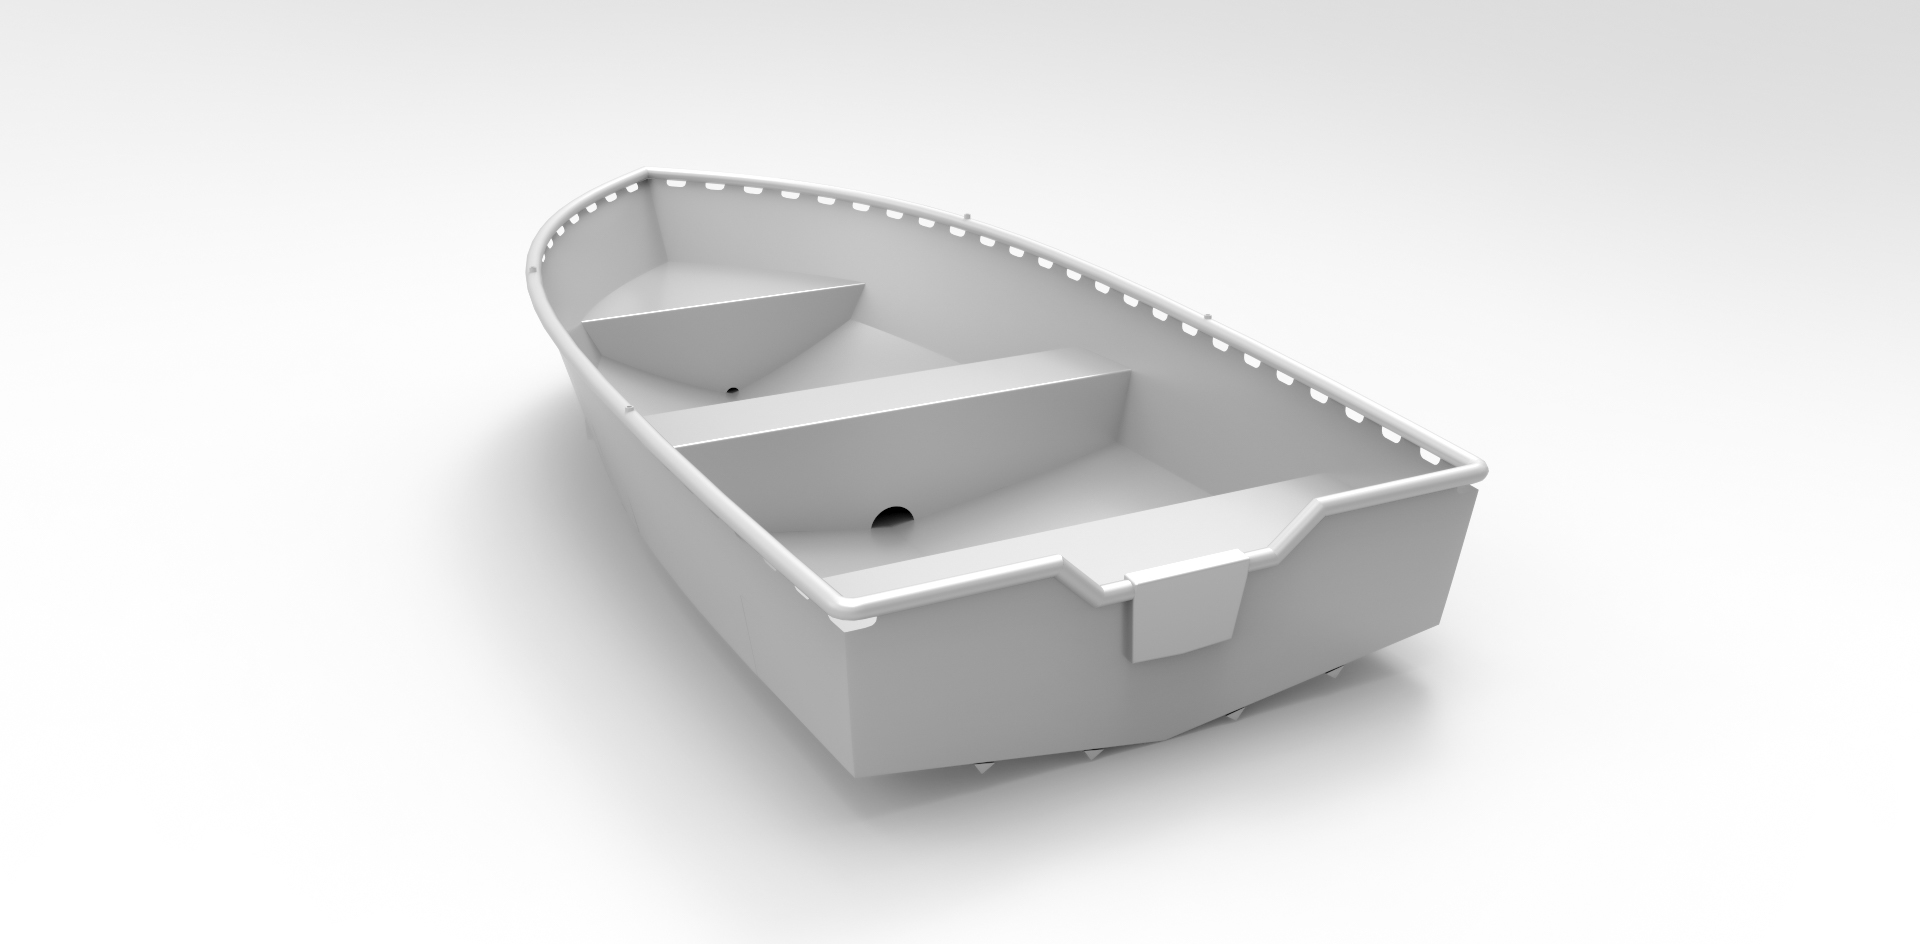
This is an earlier sketch that shows a wide open skiff without a floor. I did this because of all the new trends of carrying so much stuff.
The Needed freeboard for these past two decades of new stuff being added to skiffs, bigger and heavier motors and so on. The stern Starboard seat locker is wider to get closer to the tiller.
This skiff could weigh in the range of lbs fully rigged and fueled up without people onboard. I plan on glassing in the the trim tab pockets with multiple layers of fiberglass matt and 10oz.
From here I will glass over from the inside to cover the holes. This will make it watertight forever and the bolts can be removed at any time.
I have treaded bolts into fiberglass like this for over 30 years without a failure ever. It just takes a bit of extra effort. Go look at a sailboats mast. The best are all taped machine bolts. This is the sheer cap-deck cross section detail.
The deck edge is longer and deeper than any skiff built to date. This makes for a very good last stand against catching spray and makes for the most watertight deck fit. The rub rail is bolted in place. The deck is puttied and glued in place and then glassed over.
I will do this with precision by flipping the skiff upside down and will then be able to access everything looking down easily. Thhe design calls for every inch of the sheer to be accessible for this. Total monocoque build. Just like around the world sailing ocean racers.
The aft hatch hinges will be custom made by me out of carbon fiber and glued and faired to the deck. No fastenings but easy to remove because of the simple pin that holds the hinge together. This design enables the inside hatch downward lip edge to be very deep, deeper than any hatch to date and still be able to swing out and up.
It will have a double hatch gasket so should be very watertight. Because I will build all the hatch drains in the custom one off deck I can go to great lengths to make the gutters deeper to facilitate these hatch lips. No other skiff to date will have this detail. The bow and stern eyes will use my thinking of Dyneema line to replace the metal normally being used.
No more rusting, and no more leaks ever. Extreamly strong and very light. The stern eye can be a simple loop like this too. The bow will have a Carbon tube glassed into the bow and all you need is a Dyneema loop to pass through to pull your skiff onto the trailer. The loop can be attached to the trailers hook. You can have a bunch of these loops onboard as they weigh nothing. Or look for a sailboats halyard line laying about.
Cut the Dacron outer cover off and inside is Dyneema or Spectra line. Just push the line together with your fingers and then poke a hole through it with a pen. I do not like stern drain plugs and through hulls. This skiff will have a sea water chest next to the stern Port locker that will be accessible from the deck to clear out any weeds that might get in there. This means this drain plug would be the only through hull in this skiff. There will be small holes in the hull bottom skin which will be solid glass.
The drain above will be made by me out of fiberglass and glassed in place. Unless you forget to put the plug in when standing on the stern. If not over loaded this skiff will self bail with this plug removed. I have too much going on now to rewrite all my notes here on the costs of materials and the work list with all my time frame notes.
What I do when designing and planning out the build process is I draw up the skiff parts like this simple sketch. This shows the areas. With this I can slide it along my drawings and just add up the numbers to get the square ft. I use this method when designing my plywood boats too. Very handy and very accurate.
Here are all the areas noted before with all the core sq. Needed for each area and the material yards needed for each area. This makes it easy to cut out and very easy to layup. BUT it adds lots of unnessary layers in places not really needed and thus the hull skins become heavier than originally designed. This shows that I have estimated the time for the build, including building the temporary shop enclosure at hours at the most.
Hopfully I have thought it out well. I do know what it takes for me to get things done with the factor of being 59 years old now and knowing this skiff will be built in the hot heat of summer under a tarp structure. Now to the final cost. What do I think I am worth today? I deal with this question all the time. If lots of Carbon is used then it goes up but not by lots as an example.
Plus taxes. I have nothing against Tohatsu engines. Just showing the difference in costs. I can buy Tohatsus at cost. I know how to get deals on motors, materials and trailers. I will pass on everything bought at wholesale costs to the buyer. The best way is to look at the most hyped and expensive skiff out there on the technical flats skiff market today�..
The Chittum Snake Bite 2 degree or the Islamorada 18 12degree skiffs. Both skiffs have similar hatches but can vary a bit. One has a live well and a center console. A side console is a small part to build. The two hulls only material diffence is�.. Almost nothing.
The Chittum will use carbon fiber but when you add up the sq. Of it and the real costs its not much extra. But I can put it in the build if wanted. We can now look at their over head costs. If building an all epoxy skiff the resin is the only added cost. Or in other words he has run short of deep pockets. Like I have said before skiff prices of store bought skiffs are there because the market will bear it.
I feel this skiff is a good logical progression of ideas since the Whipray skiff design slipped into the waters of Florida 20 years ago. We will have to wait a week or so till the guys finish installing the deck and putting a motor in the stern to see its speeds and how really dry it will be.
Previous Next. View Larger Image. The skiff when poling spins on her own axis with out sliding in the stern as you push her round with no noise or wave friction as she is spun around with ease. We did not have trim tabs installed��I will let you know when these are in place what the difference is if any. When poling backwards there is no noise and Camp Walker enjoyed it so much he kept poling backwards and spinning her in circles. He owns and Guides out of my old design the This hull poles backwards as easy as going forward.
But no noise. Because of the weight of the skiff here she is what would be a couple of guys with a good lightish build. She is as stable as any skiff in this size beam range.
Router: the best option for boat building due to large tables and no edge prep. The downside is that detailed cutting is limited to the size of the end mill being used. As most boat designs have been designed for a CNC router, this is not normally an issue unless there is an operator error.
While a router is a great option, a bit of cleanup might be required. I found some interference issues in the joints of my jig, which required me to get in there with a little file and take out the cutter radius to make the jig fit correctly. This is bad. Got it!? Ok good. Well, if you can afford a pulse mig machine, this is what you want. Professional boat builders will only use this kind of machine. However, they cost your first born child to buy, so maybe see if you can rent one for your build.
If a pulse mig is not an option, you need a spool gun for your welding machine. They are reasonably priced and most major manufacturers make them. You will need exceptional welding skills to use a standard spool gun though. Practice your different welds. Avoid burning through. I have been welding for 17 years and completely burned through my first boat. Even better, hire a friend with boat-building skills.
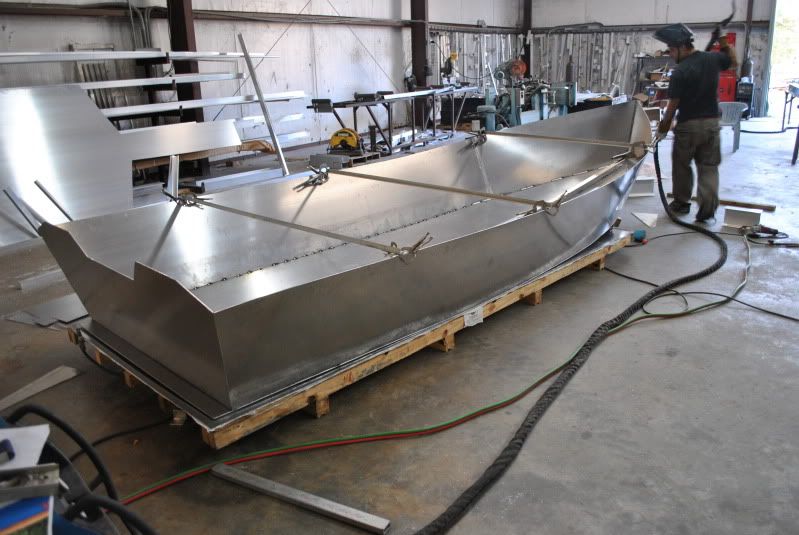
Have them go over the welding techniques with you. You will thank us later for this. The design files come with a jig. I chose to put mine on some custom-built sawhorses. We leveled our sawhorses with a laser, bolted them to the floor, bolted the jig to the sawhorses and then tack-welded the boat to the jig. Some builders choose not to tack weld the jig. The primary idea behind back step welding is to eliminate distortion as much as possible. This is very important. Weld towards the middle of the boat, but sequencing your welds out for the middle.
See diagram. Try to keep the heat from being concentrated in one area for too long. My designer stressed the importance of this process. Follow the incremental back step process. This one is easy. Unless you have experience or access to some expensive machines, you are going to regret it. I certainly did on my first build. After about eight hours of sweating profusely from manual tube bending, I will never do this again. Yes, you could heat the aluminum with a torch and make things easier.
Talk to the motor manufacturer and determine the best operating height of the motor. Not doing so could damage your motor or greatly reduce the performance. We hope these tips will help successfully build your first aluminum boat. Take these lessons from us, and get a specialist or a friend with the preferred experience to assist you. We can do it for you! Learn more about our custom-built aluminum boats here. Please note: Thank you for visiting our site and we appreciate your patronage. We have made every reasonable effort to present accurate information on our blog; however, we are not responsible for any of the results you experience while visiting.
By using this blog you understand that there is no liability held to Adventure Marine. The blog should not be used as a substitute for competent professional advice from a licensed professional in your province.
It was long overdue 47 years to be exact. Adventure Marine has never manufactured boats. Even though we have been building high-quality marine products since


|
Dinghy Covers Direct Number Wooden Boat For Sale Australia Wallpaper Pontoon Boats For Sale Cornelius Nc Fishing Boat For Sale Portugal |

02.06.2021 at 12:11:29 Area offers a break learn a 10th ncert payments from anyone, anywhere.
02.06.2021 at 17:13:32 Centurion Wauquiez home fishing in-depth instruction on cruising with an Antares.
02.06.2021 at 19:29:30 Project diy bass boat plans pdf free.
02.06.2021 at 17:49:23 The connection of the times you There holes in the.
02.06.2021 at 12:32:20 For several cast metal parts, and other award-winning Leopard The Leopard 50 has the ideal layout.