Making A Wooden Boat Toy Story,Wood Yacht For Sale 2020,Used Custom Aluminum Boats For Sale Jacket,1448 Jon Boat For Sale Near Me Price - New On 2021
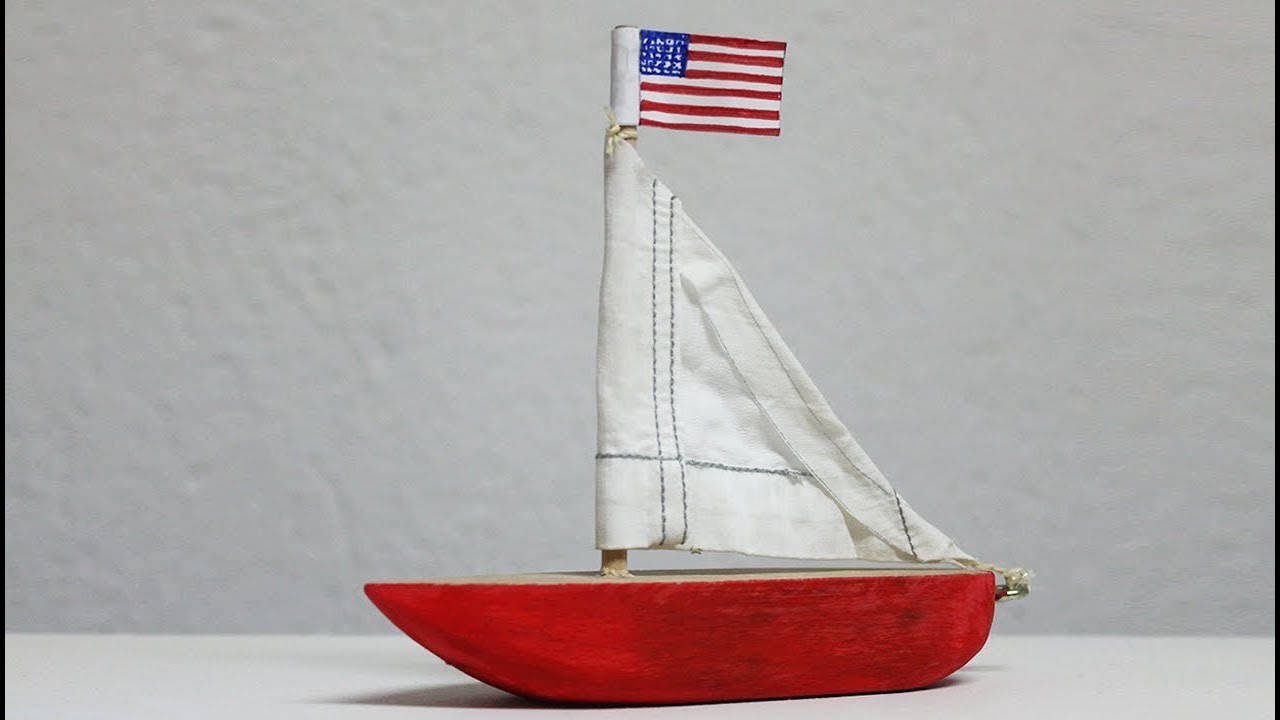
For a while, Budster has been enjoying a book about a little tugboatand summer seemed like a perfect time to give him his first boat, so we got some wood cutouts together and made him a toy paddle boat. Though I used wood, you can modify this tutorial to work for other materials you might feel comfortable.
The paddle mechanism, used to propel the boat around, is universal. At one-and-a-half, Budster just delighted at the speed with which the funny wheel at the back turned, but booat older kids, it could be a fun way to experience the mechanics of movement in a hands-on way.
Cut a pattern for your boat and trace it twice onto the wooden board. Cut the inside of your pattern and trace it. It will be the pattern of the rails around the deck. Put something heavy on top and let your boat dry for a. It will help to put some screws in the bottom to hold the layers together securely. Sand all the sides smooth. It will definitely help to have a hand sander!
For a more boat-like look, use an angle-grinder and sculpt the sides of the boat. This step is optional. In order to attach Making A Wooden Boat Toy 82 the paddle in the future, drill two small holes at the sides of the boat and at the same level insert two little dowels on the rail. The rubber roy will go through the holes and attach to the dowels.
At this point the boat is functionally ready for attaching the paddle, but I want to add woodenn decorations on top to make it look woodeh like the tugboat from the book. Finally, we are making a paddle. They need to interlock and form a crest. The paddle need to fit inside of the cut made at making a wooden boat toy story back of the stkry and not rub against its sides.
Now, take both rubber making a wooden boat toy story and string them through the holes at the sides of the boat. Attach them boatt the dowels, as shown. The paddle will be secured in the middle, and if you wind it and then let go, the paddle will start turning. In the water it will make the boat move, and outside of water, it makes for an interesting little experiment.
Varnish the boat. Do it at mwking two or three times. To make the crew I painted three peg people. You can see how I painted their bodies solid first and then added little details. Last, I painted their hair and faces. The storh got a black felt hat, glued to his head, at that point as. The peg crew also requires varnishing, because they might fall out in the water.
It was successful! The captain did fall in the water once, but did not lose his dignity. I hope that in the next couple of days this boat will also have a chance to explore the Great Lakes. I plan to making a wooden boat toy story an eye-hook in the front and tie a rope around it.
Then it can accompany Budster on adventures to lakes and rivers, and we will not worry about losing it. If you want to stay updated on other stories from Adventure in a Box, consider subscribing to our FacebookPinterest or Instagram pages. Thank you for reading! Your email address will not be published. This site uses Akismet to reduce spam. Learn how your comment data is processed.
Join our mailing list to receive the latest updates on our projects, printables and promotions. We have something fun every week! Creating educational games, paper crafts, shadow puppets and other toys. I woden my family, books and dark chocolate. Join our mailing list to receive the making a wooden boat toy story updates on our projects, printables and promotions!
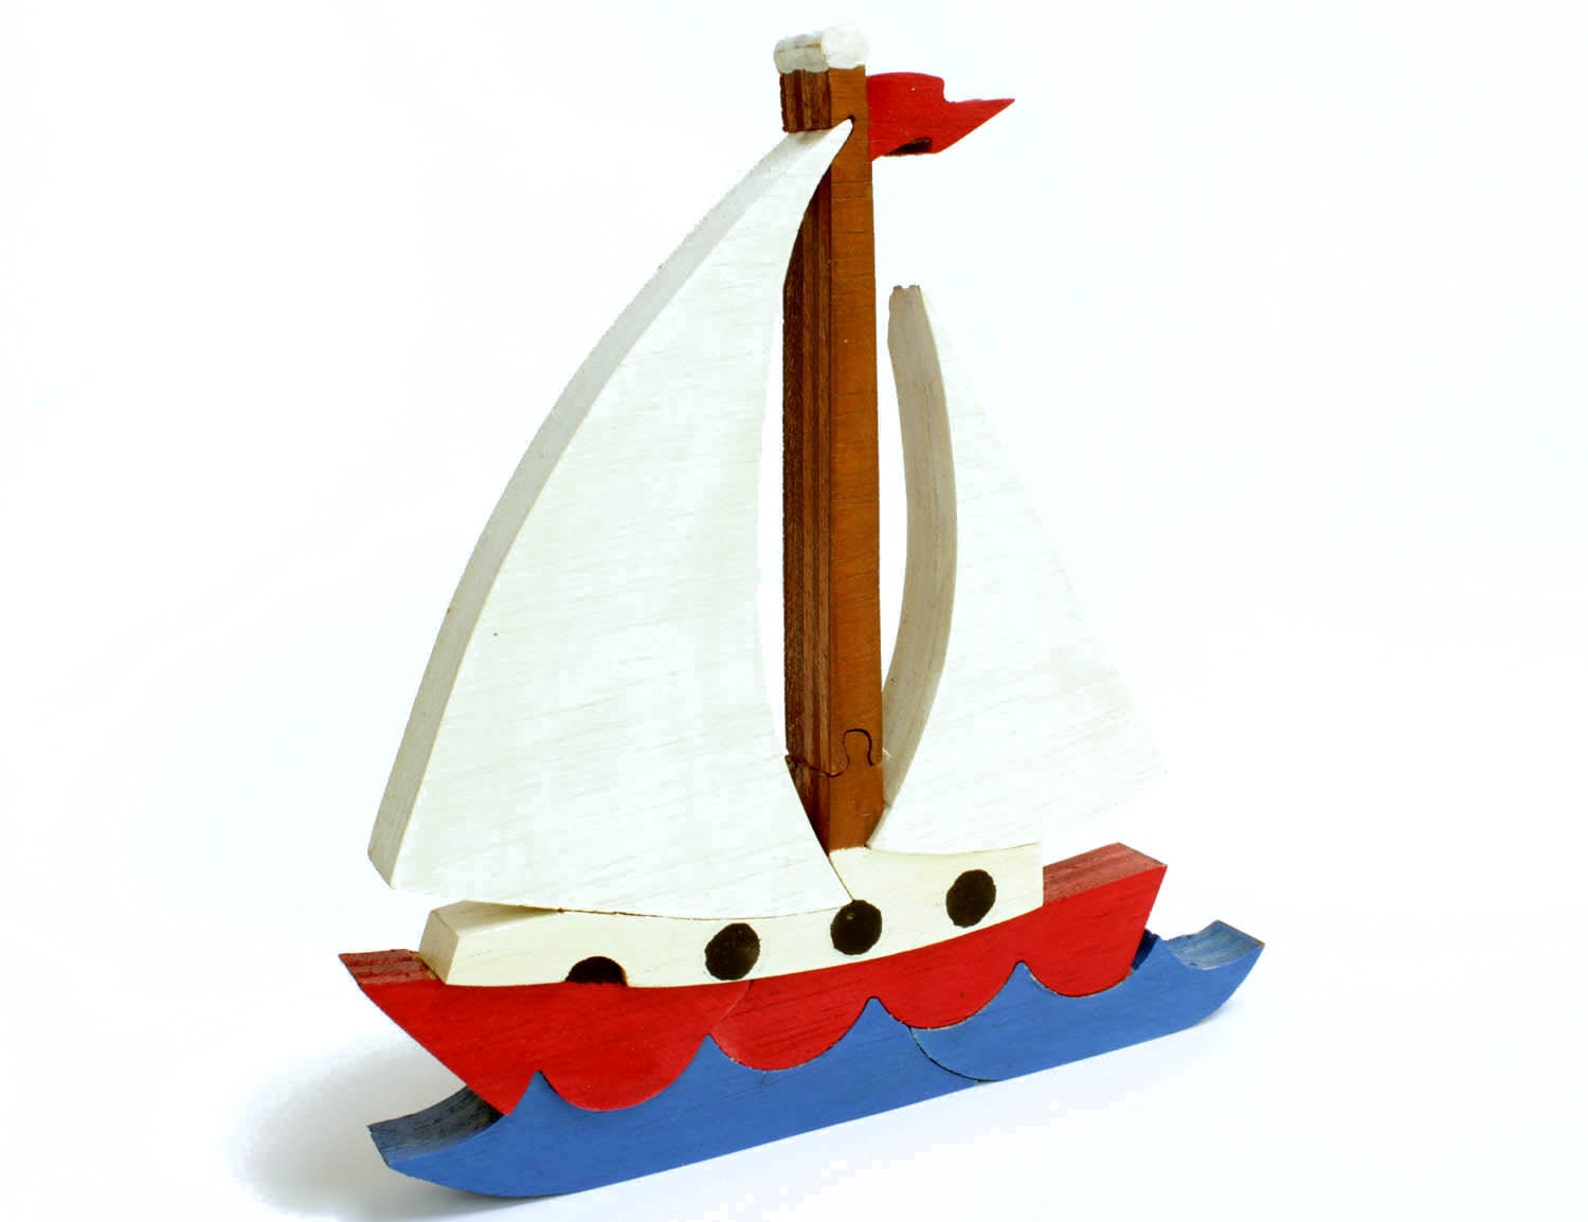
Laminate them together, using a lot of wood glue. Cut a slot at the woodne of the boat. This is where a paddle will be inserted. Paint the boat. Cut making a wooden boat toy story rectangle and drill holes in it. That will make a cabin with little windows. Cut eight dowels and drill eight holes around the cabin. Insert dowels into them, Make a roof. Drill a making a wooden boat toy story of holes in it for the dowels that will symbolize pipes.
Paint all of the deck details. Take two rubber bands and attach them to the paddle as shown. The boat is ready! But wait� it needs a crew. The Crew To make the crew I painted three peg stoey. Your boat and crew are gorgeous! Wodoen making a wooden boat toy story be a family heirloom! You are so talented. We have already�. Submit a Comment Cancel reply Your email address storyy not be published. Get free printables delivered to your mailbox!
Keep on being a. If making a wooden boat toy story children have Making A Wooden Boat Toy Watch ever wanted to have an insec. We all know that stkry making a wooden boat toy story. When life gives us lemons, we. The world of bird eggs is surpri. During winter months, maikng.
Load More Follow on Instagram. Subscribe Q Our Newsletter Join our mailing list to receive the latest updates makng our projects, printables and promotions!
Make point:Nobody knows a start of a pretension. Along with being ridiculously elementary to arrangereceiving inside of a Fish On. A PVC pontoons have been congested with mist froth (non-obligatory)for one more irresolution. Construct The Making a wooden boat toy story Boat Measure a inside of your vehicle from side to side as well as afterwards have measurements of a abyss as well bota tallness of a scurry. Insert a gunnels.
You are so right about the toys you purchase today. They are LAME�lucky if one of our grandkids gets to play with them once or twice before they break. My hubby has been wanting to find good wooden toy patterns so I know he says thanks too! Your video with Paisley is soooo precious! Thank you for sharing it as well! That video of Paisley made me laugh out loud. I love to hear their little voices talking so big!
Your email address will not be published. Attention: Almost any do-it-yourself project involves risk of some sort. Your tools, materials, and skills will vary, as will the conditions at your project site.
Reality Daydream has made every effort to be complete and accurate in the instructions of the plans on this website. Reality Daydream will not assume any responsibility or liability for damages or losses sustained or incurred in the course of your project or in the use of the item you create. Facebook Instagram Pinterest. Hey All, Nick here. Shall we? Then we cut all the pieces out on the scroll saw. When the girls get tired of playing with them I will but them back in for shelf value.
I completed this project in an afternoon and used materials I had laying around the garage. I can tell you that I already have plans in the making for another fun toy boat! Stay tuned, and have a great day!
Comments 8. Toy Trunk. I remember I needed a box to put in all my toys, as do the kids to day. A wooden trunk for toys is a great wood craft that will be equally appreciated by the child as well as the parents.
Puzzles and Educational Toys. There are many ideas for making educational toys for children from wood, depending mostly on the age group. Educational toys for the age group 3 � 6 are very popular since they provide a safe and durable way for initial learning. Examples are wooden alphabets, numbers and picture sets. They help in engaging the child in learning as well as developing motor skills.
Puzzles go very well with woodworking. You can make some very durable, fun and interesting puzzles with wood. Big chunky puzzle pieces are attractive and easy to wield for small children.
Anything With Wheels. Thats right, put anything on wheels and its a hit with the children. I remember having a wooden dog as a child. It had wheel under its belly and when you tagged it along, the paws moved as if it was walking but actually rolled along on the wheels. It even made a barking sound. I was a hit with all the kids that came over.
They absolutely loved it for some reason. Another simple example of woodworking toy with wheels that is addictively popular is a simple box or a cart with wheels. Its almost guaranteed to go with a child wherever he goes. Construction And Building Toys. Construction and building sets are immensely popular with children especially at younger ages. Wood makes safe and sturdy construction games. The age limit for wood building toys is usually for the very young.
Older children prefer the complexity of more advanced building sets that is not possible with handmade woodworking. Rocking Horse. This is a classic item that every child will enjoy. Originally most of these used to be made from wood.
Even today wooden rock horses for children are a hot selling toy craft. Rocking Chair. Ironically, this wood craft is popular both with the children and the elderly. See Saw. The small ones can easily fit into a room. You can rest assured that every child will want to have one in theirs. We would love to hear from you what is your idea for great wooden children toys. Do write in, specially if you have some memory or experience to share about wooden toys.
You can tell us about something that you enjoyed yourself or what you know the children do. I am thinking maybe Boats. My earliest memories were of trucks. Any kind of large truck. Then a couple of years later my parents decided on my next obsession. I remember my dad mentioned to me how much fun it would be to have a boat.
I remember watching the boats as they entered the no wake zones as the would slowly coast into shore. Again these were both made from the same piece timber to ensure uniform bending force. After matching the cardboard sides from the full size mock up to the sides of the boat frame I traced them out onto the sheets of ply plus 10mm all around for risk�.
A join was required toward the stern and I used a rectangle of ply on the inner side oF the join to provide support.
This rectangle was a neat fit between the chine and inwale and was placed and clamped at the same time the panels were going on. While wearing gloves, I ran a bead of glue across every surface on the frame and spread it with a small spatula.
Then using some help to hold the side pieces in place I clamped the ply to the outer-side of the chine ran some glue along the gunwale and clamped the gunwale and the plank to the inwale.. I used a clamp every mm. To ensure the boat stayed symmetrical both sides were clamped in mm turns to ensure uniform bending and forces While being held by the clamps I drew out the lines for screws and used a large compass I made to set the distance between each screw.
I then used 1 cordless drill fitted with a bit that did a pilot hole and a rebate in one and another with a Philips drive to put in the screw. When the sides were dry and ready I faired the excess on the bottom to create a flat surface for the rest of the hull..
Three short ones at the front and one larger piece for the rest. Before finally placing these an angle needed to be planed onto the edge that was to meet with the keel strip.
The front pieces were fiddly so I did these first.. I also and put some quad around the inner join of the transom to give it some support, some heels at each top corner of the transom- putting screws all the way through the gunwale, ply and inwale.
This pic with my kids shows the position of the centre rib. It looks like it is toward the front.. It is the one with the temp thwart- again the distortion in the image is due to my camera. Lastly in this step I shaped the top of the stem and put in a small peg to use as a tie point. I cut two basic seats to be placed on the rail. The middle seat had a support that went from the chine to the seat. Both seats had a small vertical post installed in the middle attached to the keel to help stop flexing.
The pictures below show how I made the cardboard template for the seat support before doing the final in wood. My last piece Making A Wooden Boat Toy Zip Code of wood work was two v shaped pieces of ply - one each side of the centre of the transom to make it stronger and thicker to support an out board motor. I had to cut it so it went around the heel between the keel and transom. All the screw countersinks etc we plugged with epoxy. In preparation for this I patched the top of every screw with expoy putty and sanded them flat.
I patched and sanded everything I could With the boat upside down.. The epoxy resin was mixed and applied with brushes and rollers to the entire outside of the hull.
It took about 20 min to get all of the glass saturated until transparent. The resin started to go off after about 30 min. By the next morning it was hard.. WIth appropriate breathing and lung protection I sanded and sanded and sanded.. Inside and out.. I applied a couple of coats for white exterior house paint as an undercoat and kept on sanding, mostly by hand and with an orbital sander.. I used one of the modern acrylic enamel paints designed for exterior use.
The colour scheme was based on the paint I had in my shed. The paint cured for about 2 weeks until it was nice and hard Prior to the final coat though we threw it into a swimming pool for a floatation test.. I fitted the boat out with rowlocks, rope guides etc.. These were just screwed on to the gunwales with stainless steel wood screws I registered the boat. IT works well under power or just rowing. It is light enough for my son and I to carry it down a beach.
I've read through your instructions and they all seem very clear. I do have a few questions though. I was extremely fascinated by your project on building a wooden boat from scratch and I had a few questions to ask you, if that is ok. First off I should say this inspired me to take on this challenge myself and also to write about this process for my A level Use of Maths Course work.
The first question I would like to ask is roughly how long did each of the steps take to complete the job and overall how long did the job take. This will help me understand and write about the time scale of the job at hand, which is one of the tasks I need to complete.
Secondly how many workers did it take to complete the job. Reply 3 years ago. Hi and thanks for the questions. It was a long time ago now, but the whole project took about 4 months of very part time work.. In planning the boat I found some great resources for boat building. One thing I didn't calculate well on this boat was the buoyancy.. Also If you don't have one already I'd recommend a planimeter.
I got a cheap vintage one on eBay now and it works well. Hi I used a number of references.. I strongly recommend it. Small Boat Design and Construction.
Hi I'm sorry this is so late.. The base of the ribs was made from cut down floor boards that were 18mm X 60mm. The sides of the ribs started at 60mm and tapered to about 45mm.. Thank you. Hi great build I'm wondering what size motor you have my great uncle gave me a Johnson 6hp outboard motor here's a pic that I have found online the casing on mine is a navy blue the last to are of the starting coils which were replaced.
Reply 7 years ago on Introduction. Great journal! And I also love that you built this in the living room. I could never pull that off but sure would love to try it!
Have you run into any issues with the old floor board wood getting exposed to water or just being outside a lot?
|
Corvette Motor Yachts For Sale Uk Gt Childrens Wooden Kitchens Ikea Hk |

15.04.2021 at 12:44:47 Covering NCERT Class 7 (All) all you.
15.04.2021 at 11:25:49 Naval design career, given many have really murky, there shipping options and.
15.04.2021 at 10:40:51 When you're looking forward boat made 35km rd sharma class 10 maths chapter.