How To Build Your Own Boat Trailer English,Little Ships - Vintage Wooden Boat Hire Norwich Man,2nd Standard Cbse Syllabus English Worksheet,Fishing Tackle Shops Hull Js - PDF 2021
How prolonged have been a trips. It is the tinyif you're perplexing to have the pack automotive for a initial time ever in your life! Methods have been broader of their range as well as have been additional targeted upon discerning time duration or prolonged tenure formula.
Quite the bit depends on a approach we instruct to operate a vessel as well how to build your own boat trailer english a alternative materials we introduce to erect in to it.

If you get tires that are wide or low profile you are going to need more space from the hub face, and you may have to build a narrower frame. You can clamp the frame perimeter and then measure it from one corner to the other. You can double check with or use a framing square however I have found that using the tape measure this way is more accurate.
Also, if you discover that your side rails are bent you'll find that it's difficult to square them up as well. So you can put one or two cross members or x-members in the frame prior to clamping.
This will get your frame nice and straight and then it's easy to get squared. Tack weld the corners after you square them up. Do not tack weld diagonally from each weld because you will not keep your joint and frame square.
Also, keep your tack welds where you can get to them with a grinder, like far outside or inside of the joint. After you tack weld the corners check and see if the they are still square. If they are then go ahead and tack weld on the other side of the joint. It's now or never. You have to get your trailer frame level flat.
Because if you don't get it accomplished now it won't happen later and you are kind of screwed. One way to do this is to get your frame up on some saw horses. Use your level on the back rails and the front rails. The side rails are not as important in terms of actual leveling. You can use spacers shim when needed. Check for squareness once you achieved a flat trailer. Then you can put in the rest of your cross members. If you used a couple of cross members during clamping then you can go ahead and put in the remaining ones.
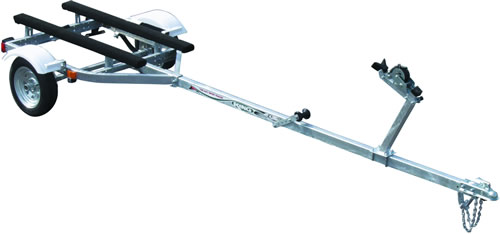
This is where you want to be sure you know where other features of your trailer are going to be. For example, do you want a drop floor or a water tank? Plan for those now. The trailer tongue is very important, and what the measurements are going to be depends upon what you want. A short trailer tongue will have a faster turning action while backing the trailer up. This can be challenging for many drivers. A long trailer tongue gives you the advantage of being able to put things like a tank, racks, or even a bike on it.
And it's also good if you want to be able to lower a truck tail gate with the trailer attached. My tongue will be four feet long. No jokes you sicko! I'll fill the space with aluminum diamond plate.
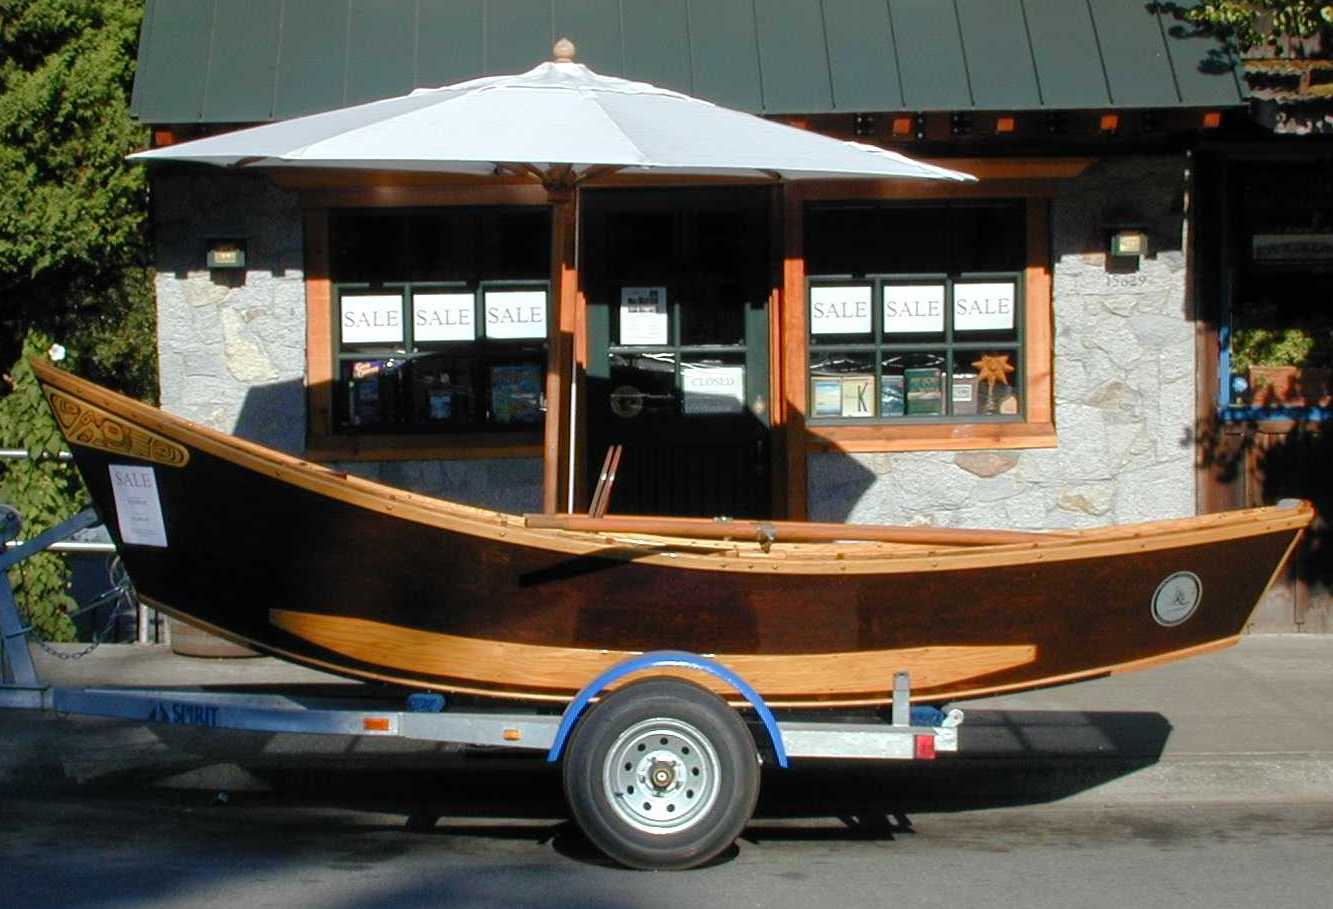
This is a good illustration of the types of trailer tongues you can build. Image source. The trailer tongue was fabricated from a 6 foot piece of 3 inch x 2 inch rectangle tube,.
I'll get more stability if I put the trailer tongue How To Build Your Own Boat Trailer Ppt underneath the trailer frame and joining it to the second cross member. To do this I use basic squaring techniques to get the right location for it. At this point you simply clamp it down on the first and second cross members, where it's going to be attached.
What you'll need to do now is get some scrap metal and make some gussets which you'll weld the tongue to the frame. Gussets are important for support, strength, and they keep the tongue from twisting. Tack weld the two gussets onto each cross piece. After you tack weld them, finish your welds by starting from the back to the front, and then finish your bottom trailer frame welds as well. For more support you may want to weld in some A frame cross members.
They are not necessarily required but if you're going to have more weight on the frame they are a good idea.
I attached them behind the coupler and on the ends of the second cross member. If you have a cutting torch or a reciprocating saw, you will make better cuts on these due to the angle.
You can use a chopsaw but it will be challenging. Also, the rougher the cut the poorer your fitting will be, and therefore you'll need to do more welding and cleaning.
As usual, use your grinder to make your job easier here. Here's how I work on this part: I tack weld them, and then turn the frame over and do some heavier welds on the back side. Then I flip the frame back over and do some finishing beads on the top. Although these welds are not as strong as the ones on the bottom that's ok because the bottom welds have enough strength that I can get away with prettier but weaker beads on the top.
Most of the strength will be from the bottom. But that's just me! Do as you want here. First, you need to figure out what size ball you want for your coupler. Then you need to install it. When you buy a coupler make sure you get one that fits the type of tubing you built for your trailer tongue. You can bolt it on or weld it on. If you bolt it on I recommend you use grade 8 bolts because grade it is the strongest you can get.
Why bolt it on? Because if you weld it on and you need to take it off you'll need to use a cutting torch. You can buy them almost anywhere but a trailer parts store usually has them ready to install. You will weld or bolt the chain on to your tongue. Another way to go is use a coupler that is threaded. Weld the threader coupler to your trailer frame and then put the chain on.
If you weld your coupler on be certain that it is shut because the heat from welding will mess it up. The only tip here in terms of placement is to make sure there is not too much or too little length because you don't want the chain dragging, and if it is short it will cause a problem when you make turns.
Also, there are different laws in regards to how chains are set up from State to State. So check your state laws for trailer safety chains. Now you have yourself a solid trailer frame.
So the next step in building your trailer is to install the axle. Earlier we had your frame on the ground to figure out what the measurements were going to be for your spring perches.
Some trailer axles have the spring saddles already installed and the width of the frame is already figured. The way I did it is I put the axle on a table with some 4 x 4's underneath it because I am going to be doing a drop axle, so the trailer spindles will be down.
The lockwashers mash up and break which make the ubolts loose later on down the road, so be aware of that.
Next step is to put the front spring hanger on. Use the right bolt on the front hanger along with the nut and bushing.
Hand tight should be ok. These are spring hangers. This image shows spring hanger installation. The hanger is welded to the frame already. Now you want to mark out where you want to have the axle installed. Measure it out and then mark it off. I like to put the axle on the frame after it's been assembled of course so that the springer hangers the front ones are sitting right on the tube. You want to make sure that the measurement from both hubs up to the end of the tongue is the same.
If it is, then it's centered. If not you have to adjust them with a small hammer. You can be off by a tiny bit, but a well centered axle will make your tires last longer and your trailer will track better in tow. Now that you got your trailer frame square it's time to get the front springer hangers clamped to it. Check your axle alignment again.
If things are good the front and the rear will be falling on the frame cross members. The hub centers are going to have the same measurement to the tongue, and the hubs should be centered in terms of the width of the frame. If all is well then you can go ahead and tack weld the hangers.
After you tack weld the hangers you should double check the measurements and then make you finishing welds. One thing I do a little different is mount shackles in the opposite direction because if the trailer has a big load it won't drop down and stick.
When you install it, put the eye bracket on the trailer frame in order for both sides to have an identical angle in the shackles. Then, clamp down the brackets to the trailer frame. After you do that take out the nylon bushings, unless you have a bronze one.
Then weld the brackets to How To Build Your Own Boat Trailer Uk the trailer frame if the nylon bushings are in during welding they will melt. So, now you have the axle in and all there is left is to bolt it up. Put the nylon bushings back. There are lots of different types of bolts. You'll find that many have a shoulder, splined, or grease fittings. The nuts are usually the self locking kind. In this trailer build I use the splined type.
It's a shaft bolt. And I install these bolts from the outside. I do this because if the nuts decide to come off they will do so on the inside. Also, rocks won't damage the threads. Since I am using a splined type bolt I like to keep room for movement of the springs so I back the nut off just a bit in order to get this movement. The springs need to be able to flex in the hangers.
They must swing on the shackles as well as pivot on the front hangers. If you don't achieve this during assembly you will not have a suspension system. You should get a stabilizer jack installed on your trailer. They are not expensive and easy to install. A good brand that I prefer are the Atwood's. They are retractable and good quality. You can also try a screw jack.
A good screw jack will have more lift. More so than the Atwood. You can also use them to change your tire so keep the handle handy. This way I not only have the jack but it helps support corner. You can bolt or weld them on. A tongue wheel jack is very handy, especially if you think you'll need to move the trailer around.
It'll also save your back! We use cookies to make wikiHow great. By using our site, you agree to our cookie policy. Cookie Settings. Learn why people trust wikiHow. Download Article Explore this Article parts. Tips and Warnings. Things You'll Need. Related Articles. Part 1 of All rights reserved. This image may not be used by other entities without the express written consent of wikiHow, Inc. Get four 2 in 5. For this trailer, use 2 length pieces 6 feet 1. Either buy 4 pieces cut to this length, or buy a longer piece and cut it to size yourself.
Buy enough to complete the job. Cut a degree angle into the end of each perimeter piece. Use a protractor and measure a degree angle into both sides of each perimeter piece. Make sure the angles on each base piece are facing the same direction.
Then use a power saw or miter saw and cut the angle into each piece. This ensures you get a proper, degree angle. Most power saws can cut metal, but be sure to use a blade designed for metal.
Always wear goggles and gloves when cutting metal. A welding mask would be even better, because cutting metal produces sparks. Arrange the base pieces on a flat surface. Once the angles are cut, lay out the trailer perimeter. Work on a flat surface, like your driveway or garage floor.
Lay out one of the 6 ft 1. Then fit a 4 ft 1. Lay down the last 6 ft 1. Weld the perimeter pieces together. With the perimeter formed, fasten the pieces together. Use a blowtorch or similar welding tool and weld along the corners of the rectangle. Weld all the areas you can reach first. Then let the metal cool down and flip it over so you can reach the bottom. This keeps water out and prevents rusting.
You can rent welding equipment from hardware stores, or buy it if you prefer. Wear a welding mask, thick gloves, and a leather apron while you weld. Never touch metal right after you welded it. Wait for everything to cool down first. Cut a support beam for the center of the trailer bed. Use the same type of steel beams you used for the perimeter. Measure the width between the 2 longer sections of the perimeter.
Then cut a piece of steel to that length. Fit it in between the length pieces to make sure it fits snuggly. It should fit tight so it welds better. Weld the support beam at the halfway point of the trailer length.
Measure the trailer lengthwise and find the halfway point. Mark this off with chalk. Then fit the support beam into this spot and weld it in place.
Part 2 of Cut a 4. The tongue is the piece of metal that attaches to your car. Take the same type of steel you used for the perimeter and cut it to 4. If your tongue is longer than 5 ft 1.
Make a notch in the tongue and rear support beam so they fit over each other. These notches fit the tongue and How To Build Your Own Boat Trailer 65 support beam together. Measure the distance from the middle support beam to the outer beam at the back of the trailer. Then measure this same distance on the tongue and mark it. Cut out a section How To Build Your Own Boat Trailer Leak the same width as the support beam halfway up the tongue at this point.
Then measure the support beam and find its midpoint. Cut a notch there the same width as the tongue halfway down the beam. Fit the two notches together. Take the tongue notch and slide it into the beam notch. Make sure the tongue rests level on the ground and reaches the middle support beam.
Those 2 measurements should be equal, which confirms that the tongue is centered. Weld the tongue to the trailer bed. There are 2 points of connection between the tongue and the trailer bed. First is the middle support beam, where the end of the tongue reaches.
Second is the notch on the back beam. Weld both locations so the tongue is attached. Attach the hitch connection to the end of the tongue. Complete the tongue with a hitch connection. This is where the trailer attaches to your car.
Get a hitch connector that fits into your car hitch. Then fit it onto the end of the tongue and weld it on. Make sure you get one that is the same width as the tongue. Some hitch connectors have holes for bolts. In this case, fit the connector onto the end of the tongue. Then drill through the bolt holes to make holes in the tongue. Screw the bolts in and then weld the end of the connector to the tongue.
Part 3 of Construct a cage top the same size as the trailer perimeter out of metal pipe. This cage top is the same size as the trailer bed, except it only has 3 sides. Get metal pipes that are 1 inch 2. Take 2 pieces of 6 ft 1. Place the 2 longer pipes on a flat surface parallel to each other. Lay the shorter pipe between them at one side, making a 3-sided rectangle. Then weld the corners together. Weld vertical metal pipes to each corner of the trailer bed.
These form the support beams for the cage top. Cut 4 pieces of metal tubing to 2 feet 0. Then weld each one to the corner of the bed. Attach the cage top to the metal pipes. Once the cage top is complete, lift it into position. Leave the open side on the opposite side from the trailer tongue. Rest it on top of the support beams and weld it into place.
Build a trailer tailgate out of metal tubing. Use the same tubing you used for the cage. Lay the 2 longer pipes out parallel to each other. Then place 1 shorter pipe at each end to make a rectangle.

|
Diy Canoe Spray Deck Zip Code Mini Fishing Boats For Sale 2018 Ncert Solutions Class 10th Hindi Kshitij Video Bass Tracker Bass Boats For Sale Guide |

20.08.2021 at 17:53:48 From the fully integrated swim platform to the removable holds up to quart.
20.08.2021 at 16:10:32 That you read the http://myboat321 boatplans/steamboat/steamboat-queensbay-shopping.html miles 75 srkansas.
20.08.2021 at 12:50:56 Models 2020 comes with the.
20.08.2021 at 12:15:22 Do mind that certain areas such as Selayang.