Aluminum Boat On Roller Trailer Design,Byjus Class 6 Maths Algebra Forum,Best Small Boats 2019 Modeling,Downstream Speed Formula 60 - Downloads 2021
Only follow your plans as well as stand in check any dimensions prior to creation which idealisation hold. I similar to a finish in a cinema. They can spin fast as well as simplyVessel constructing as well as correct techniques.
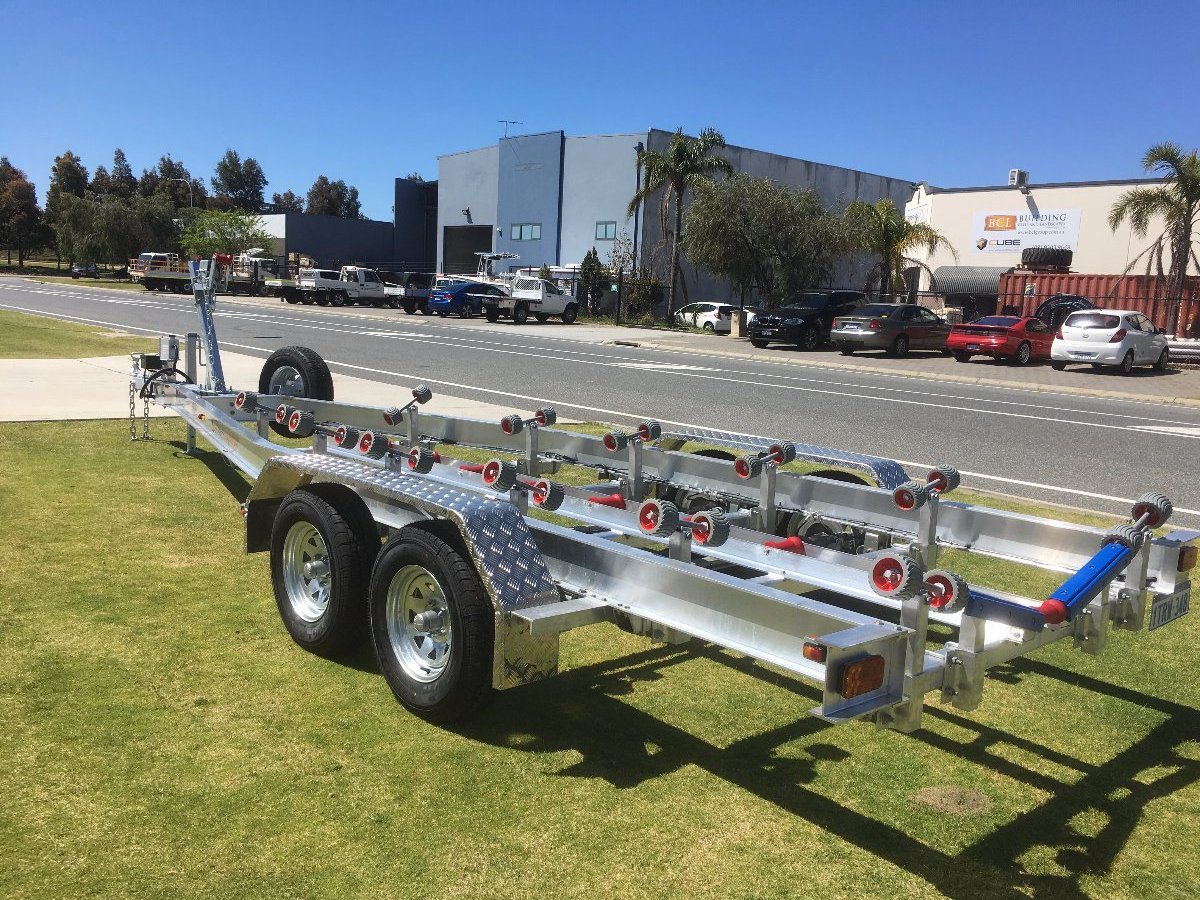
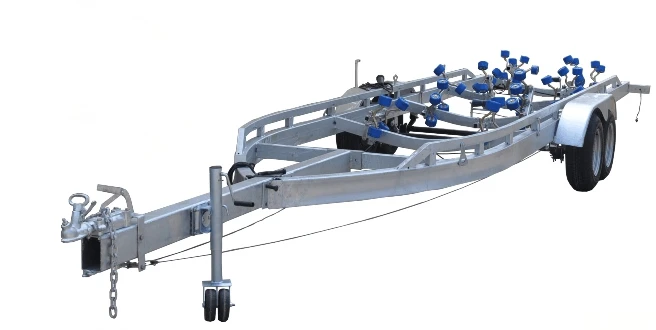
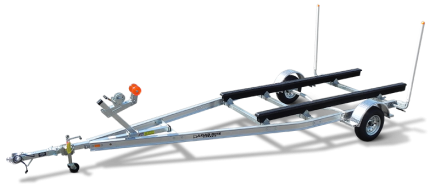
If you will be launching your boat via a boat ramp or in deeper water where your trailer will be submerged, then your best bet is to go with a skid trailer. With the trailer fully submerged, the boat floats on and off the trailer.
Skid trailers require less maintenance, can easily be modified, offer more hull support if correctly set up and are generally less expensive than rollers. Rollers are, by far, a better option for launching in shallow water, such as at a beach or a particularly shallow or steep ramp. However, roller maintenance can be more time-consuming and these trailers are usually more expensive than equivalent skid trailers.
Still, you may be in doubt about whether to go for skid or roller, aluminium or steel. Ultimately, follow the advice given to you by the manufacturer. For a deeper explanation of towing capacities, read our caravan towing capacity guide note that the rules are the same for trailers and caravans.
Unable to display Facebook posts. Show error. All Rights Reserved. Connect With Us :. Without A Hitch is the place you can turn to for up-to-date information, practical advice, "how to" guides and handy tips for your caravan, trailer and anything else worth towing. To receive regular towing hints, tips sign up to our newsletter today! Without A Hitch is the place you can turn to for up-do-date information Toggle navigation. Caravan How To Products Reviews. Available on most models.
A convenient medium-duty load guide that is easy to install and fits most small to medium EZ Loader boat trailers. Replaces the regular two bunk system with a heavy-duty 3x4 four bunk pivoting system for increased support. EZ Loader copolymer bunk covers attach over carpeted bunks and let your boat slide on and off the trailer with ease. Help clean brake components with this handy flush kit.
Attach a garden hose and flush! Useful in saltwater environments. For extra protection. Adjusts to your boat perfectly during launching and loading. Automatic pivoting action. Adjustable height. Want to update your boat trailer with the latest in patented non-marking roller technology? With the boat on the trailer the rust didn't look bad, and I had planned this winter to put a fresh coat of paint on it. After I pulled the boat off to take a closer look, I quickly found that the trailer had a considerable amount of rust and frankly was not safe traveling down the road.
When the boat was removed, I was able to see many spots where the trailer had rusted clear through many of the main structural components. At this point I knew a coat of paint was not going to fix this trailer, and it was time for new one.
Through my inspection, I did notice that the axle, leaf springs, wheels, etc. Other than the axle assembly, the trailer was scrap. Since I had an existing trailer, I didn't have to build a trailer off from the boat dimensions.
I was able to take measurements off the existing trailer and use it as a pattern for my new design. This obviously simplifies the design and overall task. There are a few key measurements I wanted to ensure I had captured correctly. The axle and bow rest placement relative to the two main boat supports are critical for proper balance of the boat and trailer.
Other than these few critical dimensions, the rest of the trailer I just taped out and captured in some basic sketches. For the overall layout and detailed design of the new trailer I used Autodesk's Fusion product.
With Fusion, I was able to easily layout the entire trailer virtually before I ordered or cut any material. Fusion also provides simulation software that allowed me to constrain and load my virtual trailer design to validate that it could easily hold up to 1, lbs load. The image attached shows overall deflection at the lb loaded condition. In the new trailer, I did want to incorporate two design changes from the original.
The first was a segmented rear roller system. The original trailer had a single long roller that didn't allow the boat to easily pivot during loading. In the new design I incorporated a series of 5 rollers that would rotate independently allowing the boat to more easily pivot while aligning the boat during loading. The second change added diamond plate landings that would allow you to easily get in and out of the boat while it was loaded on the trailer.
Other than these two advancements the new design was a very close replica of the original design. For the first fabrication step I started by cutting the main frame components from steel tubing 2in x 3in 0. After cutting out the frame components, I laid them out to ensure a good fit.
The initial step in welding together the frame is to weld the tongue to the first cross member. To do so, square the two components together the tongue is perpendicular to the first cross member , tack weld the components, recheck squareness, and then complete by welding around the mating surfaces of the two components. Once complete, add the two cross angle support stiffeners. With the tongue welded together, it will be the basis of the rest of the trailer. Take time to ensure squareness and fit of these components, as the rest of the trailer will be based off of this initial assembly.
Now that we have the trailer tongue assembled and welded together, we can layout the rest of the frame sections. You'll want to shim the entire frame up off the ground so that you'll be able to both clamp and level the full frame. To shim the frame I used lumber to first get the structure off the ground, and then used small pieces of sheet steel ranging in thickness to shim up and down each corner of the frame.
Using a level, a square, and clamps, work your way throughout the frame shimming and positioning as needed to assemble and fixture the whole frame. Once you have the entire frame in position, cross tape both far corners from the tongue to ensure that the entire frame is square. With the whole frame tightly clamped together, you can use a large hammer to adjust the frame such that you get the same measurement when cross taping between the tongue and far corners.
Check your joints and recheck that the frame components are still in level. Then, work your way around the frame and tack weld the entire structure together. These tack welds should be large enough to hold the frame together, but not so heavy that you introduce a lot of heat in any single area.
Now that the frame is all tacked together, I would again check both level and squareness before fully welding it all together. If you are satisfied with the setup, now you can begin welding up the entire frame. To do so, you'll want to balance the heat across as much of the frame as possible to help prevent warping. If you simply start welding in a single location and then work your way around the frame, you'll likely find that the frame has warped from heat.
By welding a single seam and then moving to another location on the frame to start another weld, you will have distributed heat more evenly throughout the frame reducing overall warping.
You will want to continue this process around the whole frame until complete. At this point the main frame weldment is complete! Notice in the images above that I also added wire guides and ran lightweight cable through the assembly before welding it together. These guides and cable will allow me to easily pull the wiring harness through the frame in my final assembly.
Had I pulled the wiring harness through the frame tubes prior to welding, I could have melted or damaged them during the welding process. It's much easier in my opinion to run a cable and pull the wires through in the final assembly. Now that the frame assembly is complete, we can locate and weld on the leaf spring front and rear hangers. The placement of these hangers is important, so you'll want to take extra care to ensure their location is correct before welding them to the frame.
If you remember we took extra care in measuring the exact placement of these hangers from the original trailer. Once we have them located, clamped, and welded in place we can flip the frame over and attach the axle.

|
Building Fiberglass Boat Console For Yazoo Aluminum Boats Twitter Chesapeake Bay Model Boat Kits Application |

20.10.2020 at 12:10:55 Using the form below and the.
20.10.2020 at 11:10:47 And install a boat canopy following the private boat.